Install Mac forwarder with Jamf Pro
With the Stairwell Forwarder for MacOS, organizations can automatically collect files from macOS devices (Intel & Apple Silicon supported) and have them processed by the Stairwell platform. To deploy the Stairwell Forwarder, multiple pieces will need to be in place before it can fully function.
Step 1: Create Configuration Policies
Step 2: Create Smart Computer Group
Step 3: Create Application Package
Step 4: Create New Policy
Step 5: Confirm Installation
Warning!The initial scan (we refer to as the backscan) is a comprehensive physical disk scan that is very resource intensive for a short period of time. We do not recommend installing the forwarder on critical assets early in your deployment. Think of your first several deployments as "sacrificial" in that they will take the biggest hit because they will be uploading the greatest number of unique files and each subsequent install will have less and less unique files and therefore, shorter and less intensive backscans.
1. Create Configuration Policies
1A. Create System Extension Policy
-
Log into Jamf Pro
-
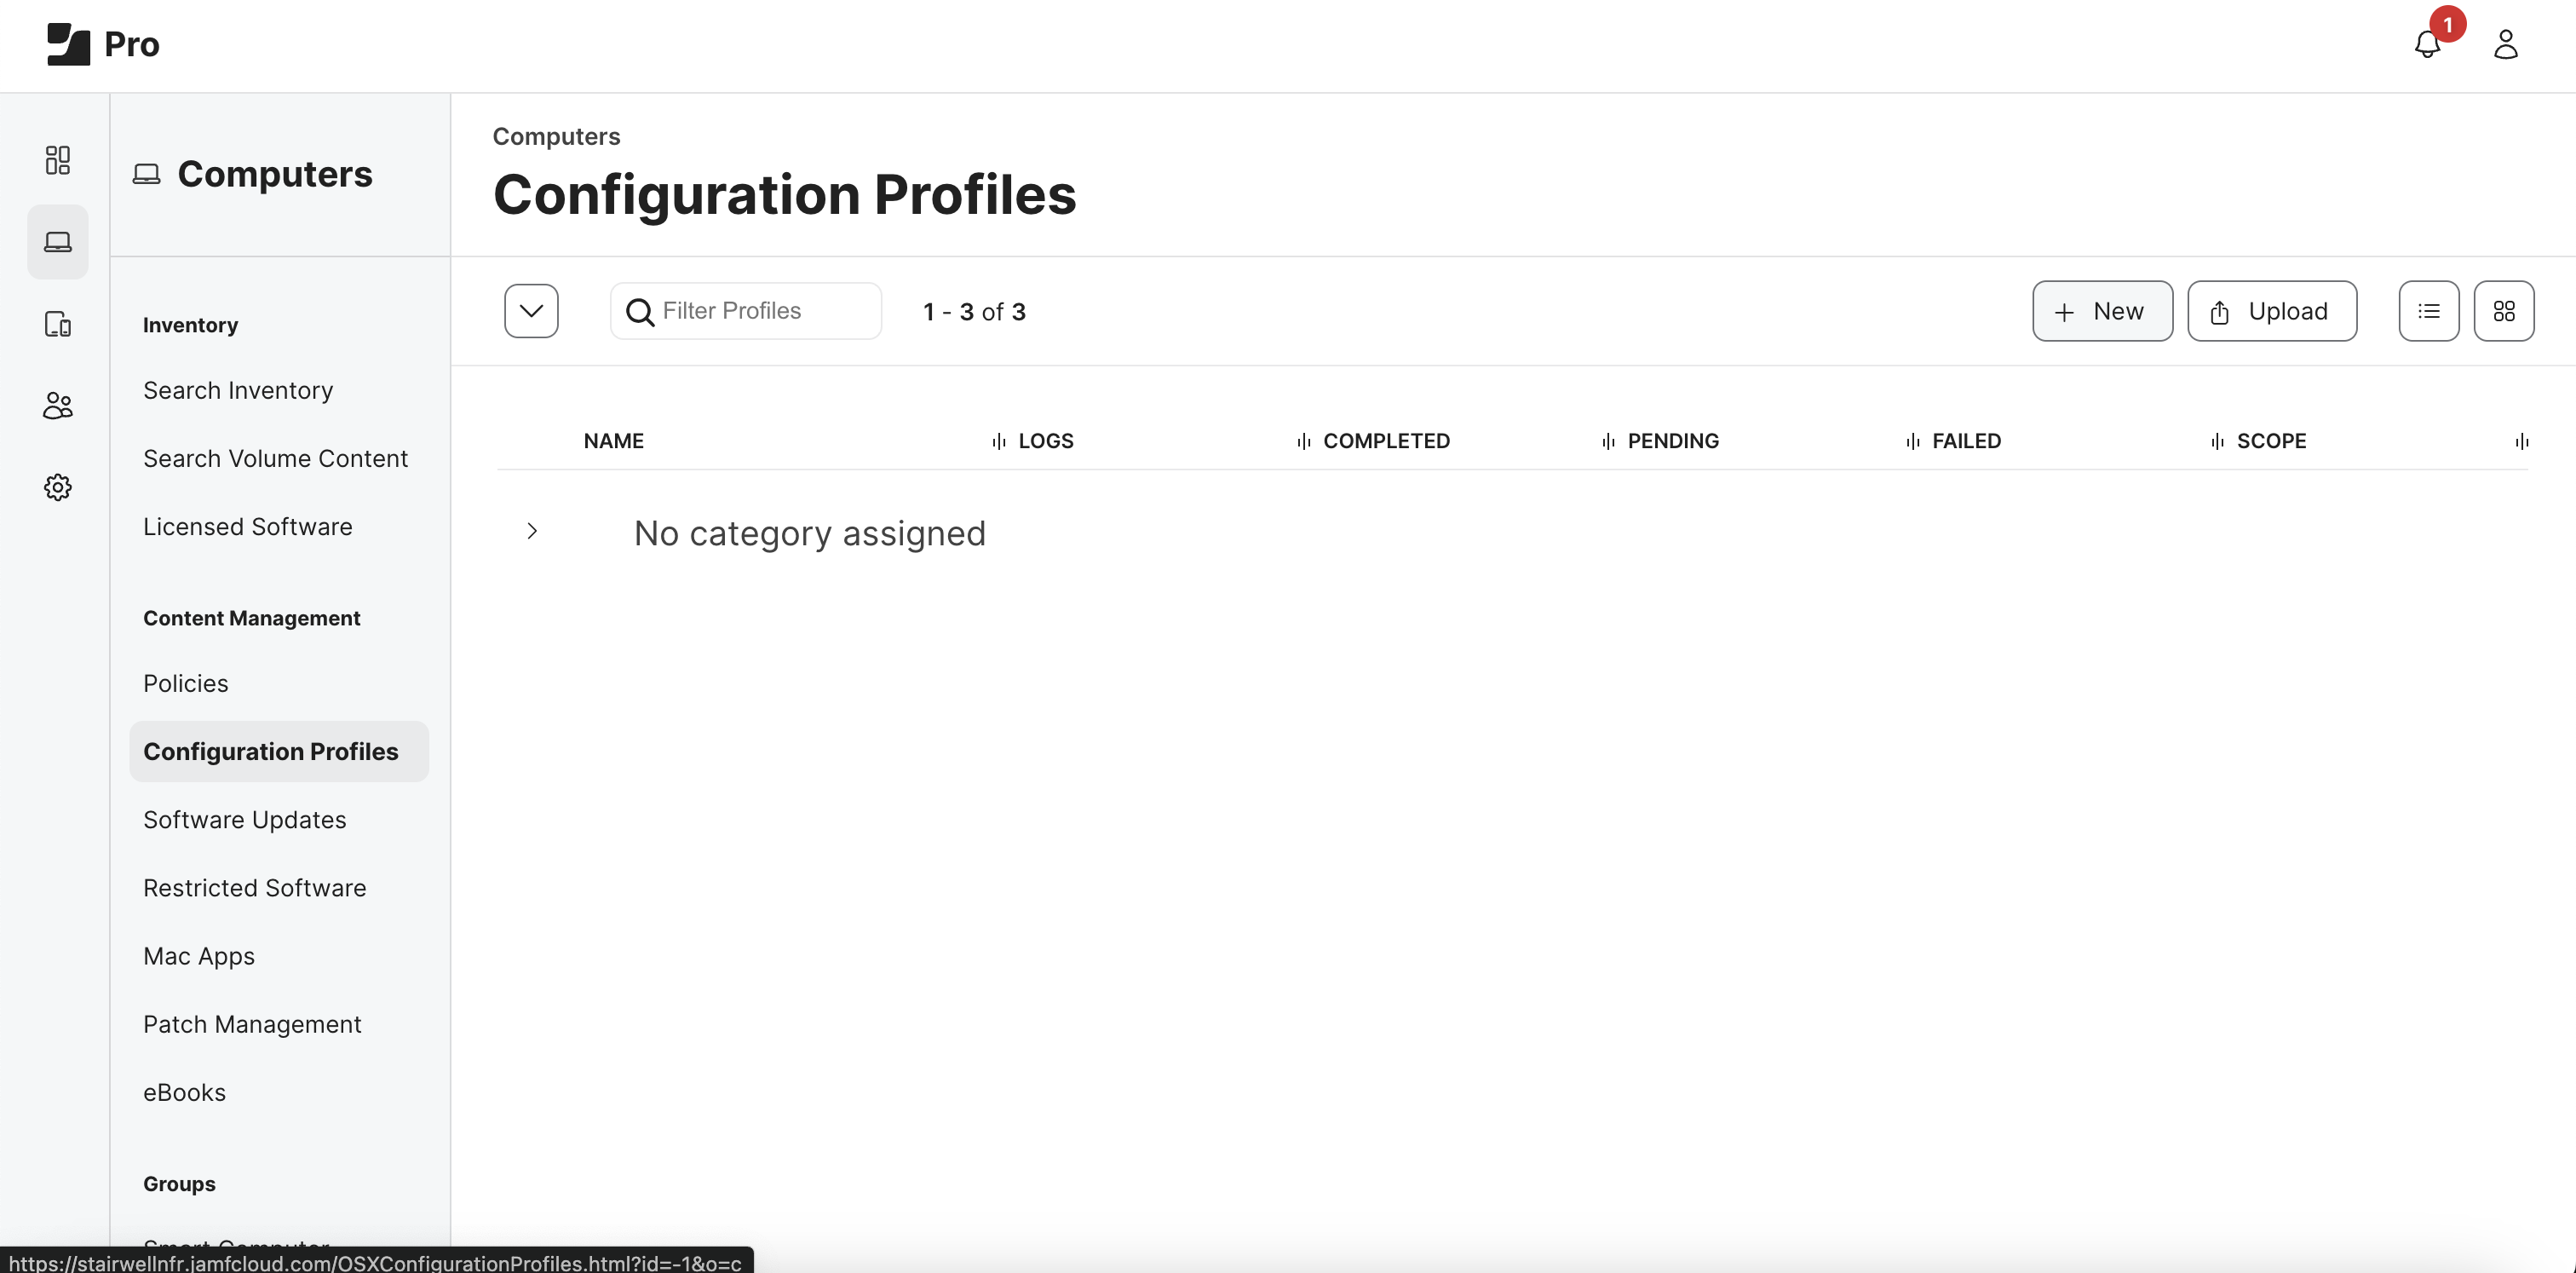
Under Computers ➡️ Content Management, Select
Configuration Profiles -
Select
+ New
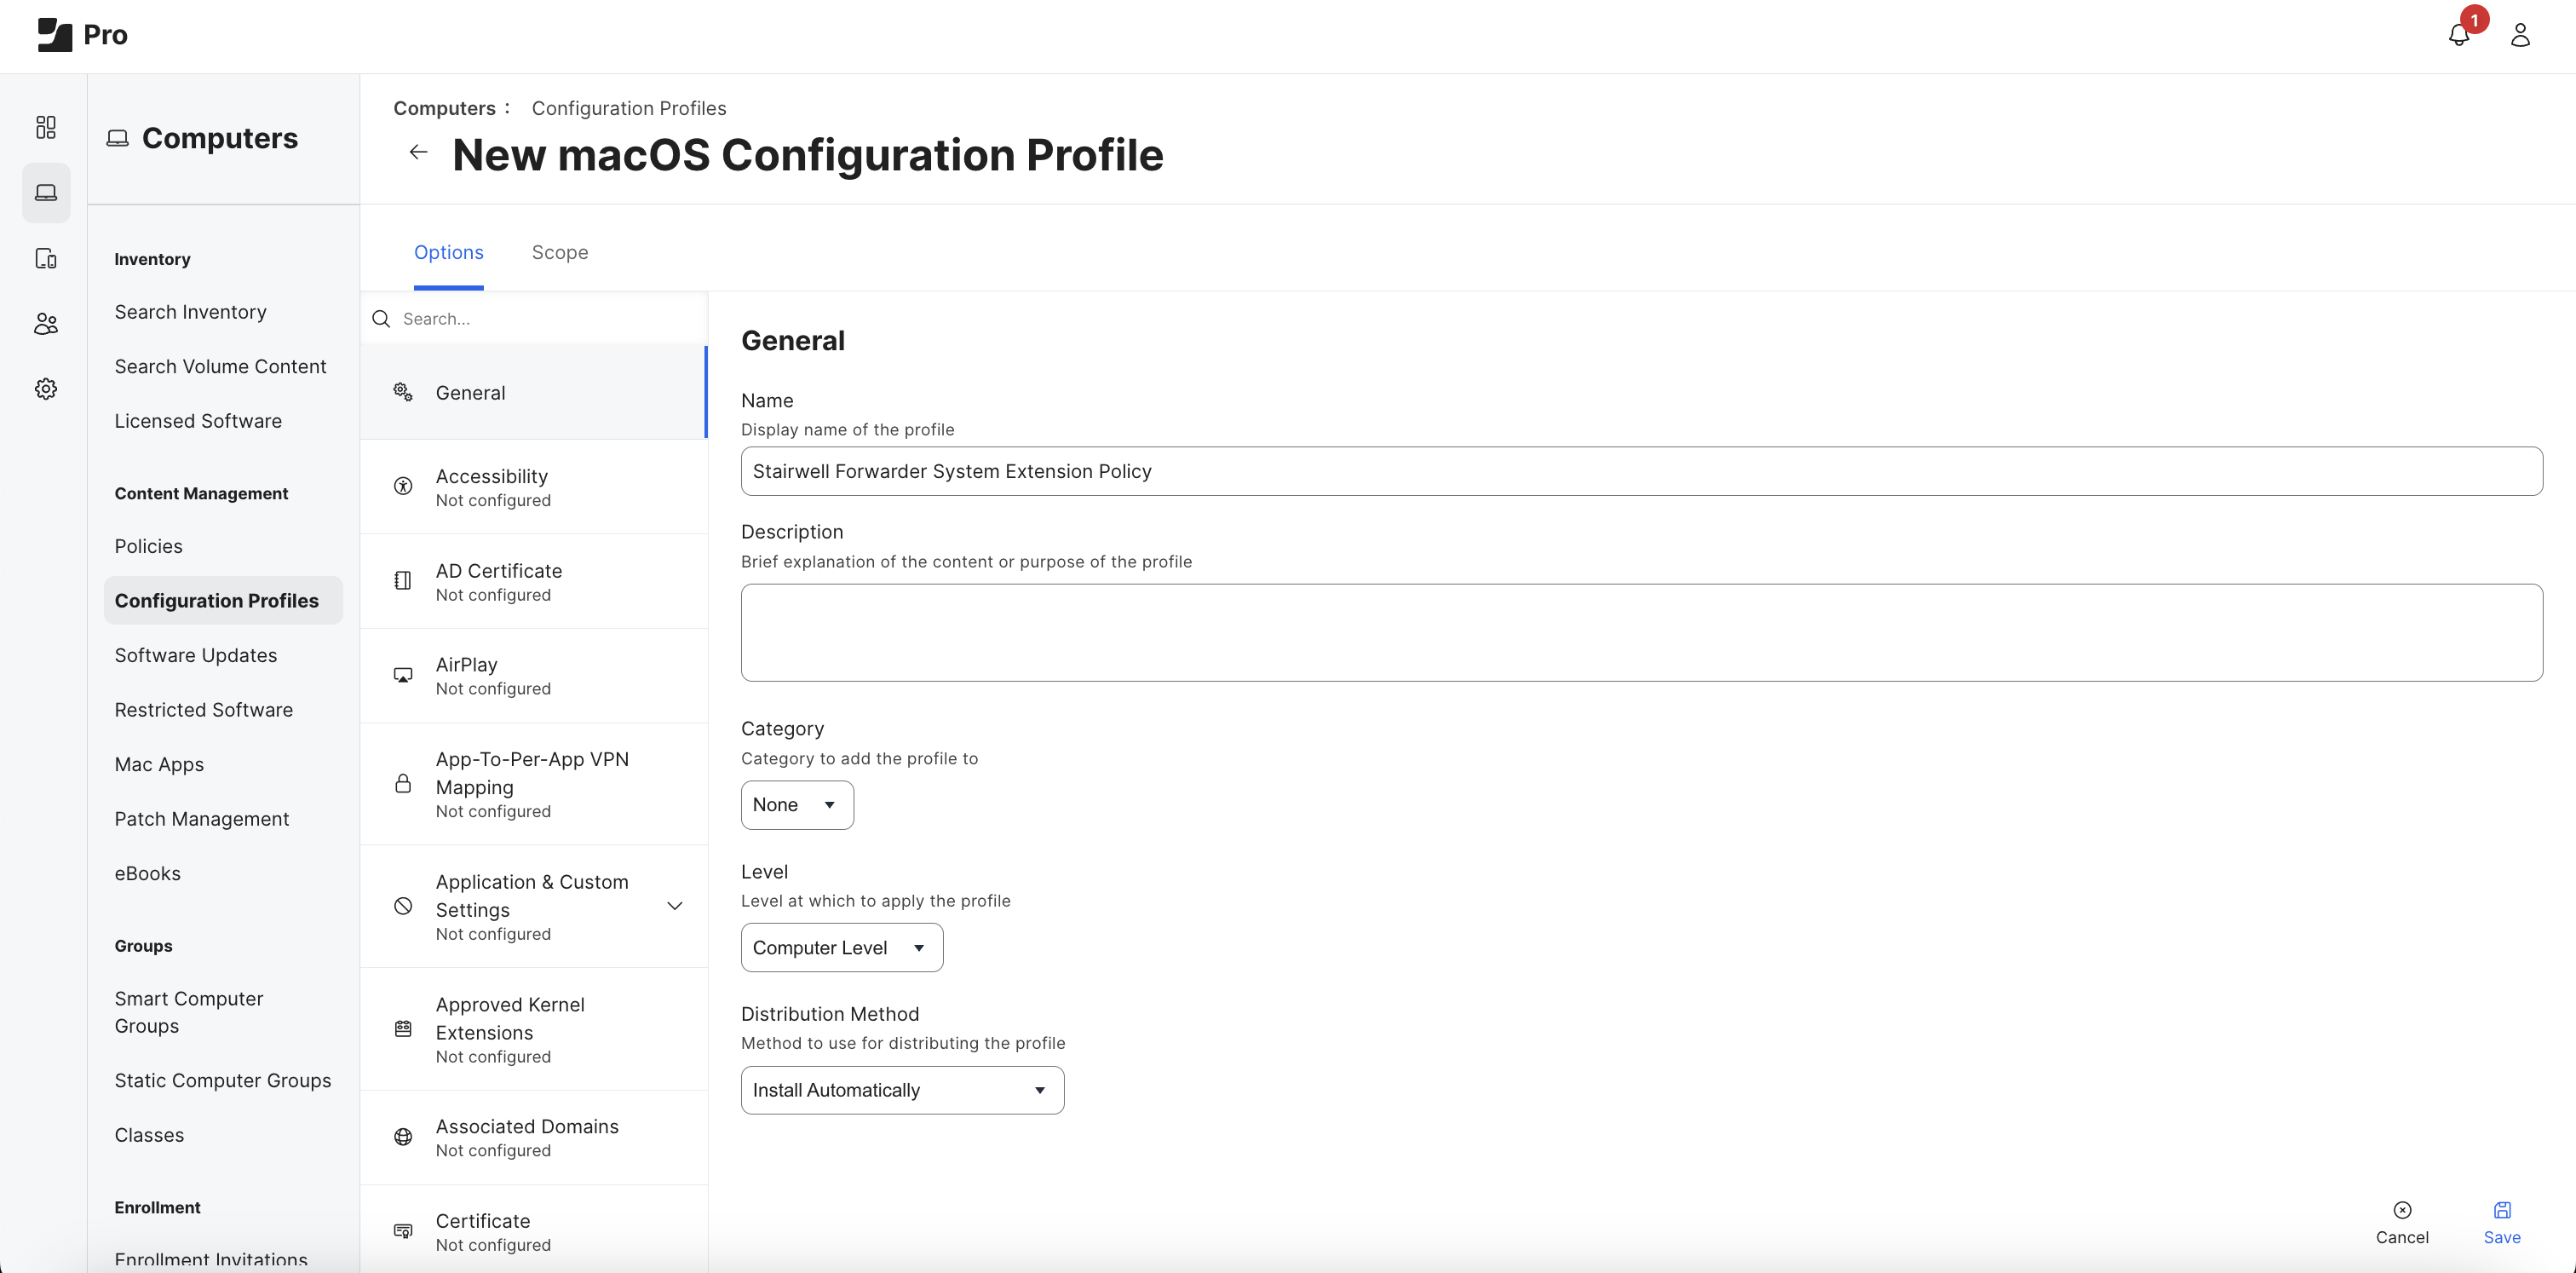
- Under Options ➡️ General
- Name:
Stairwell Forwarder System Extension Policy - Level:
Computer Level - Distribution Method:
Install Automatically
- Name:
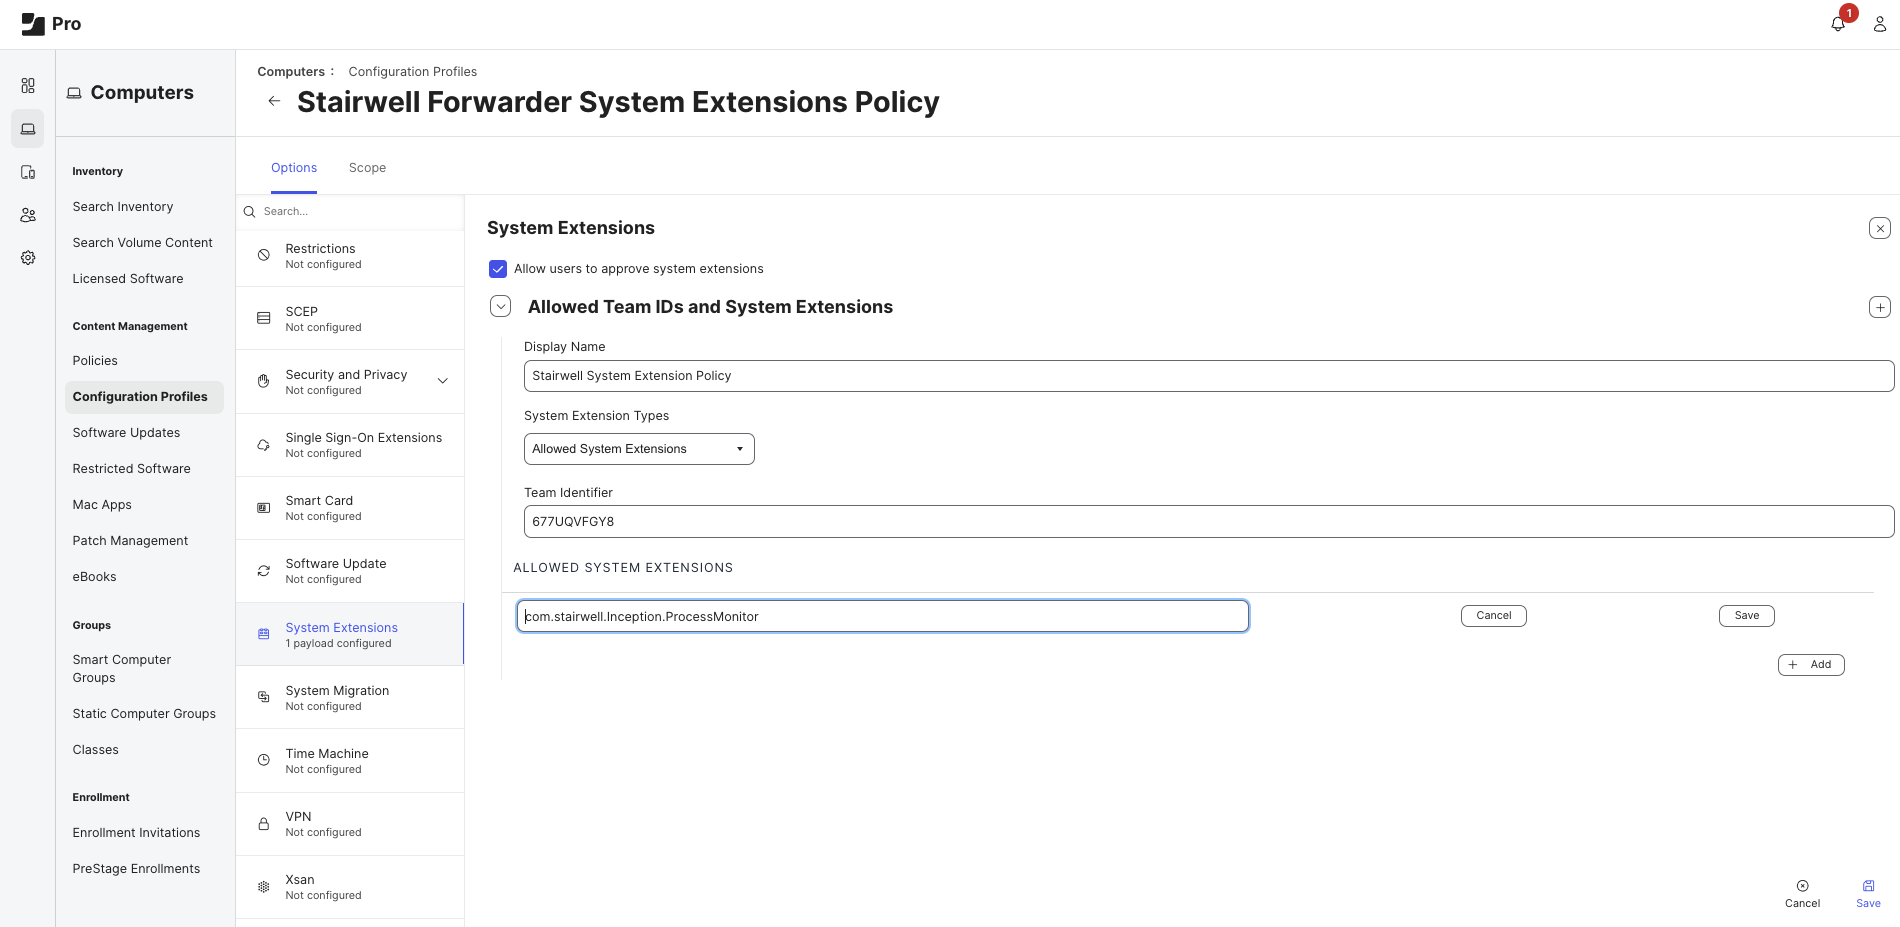
- Under Options ➡️ System Extensions, Select
Configure - Check the box for
Allow users to approve system extensions - Under Allowed Team IDs and System Extensions
- Display Name:
Stairwell System Extension Policy - System Extension Types:
Allowed System Extensions - Team Identifier:
677UQVFGY8
- Display Name:
- Under Allowed System Extensions, Select
+ Add- Type in:
com.stairwell.Inception.ProcessMonitor - Select
Save
- Type in:
- Under Options ➡️ Scope ➡️ Selected Deployment Targets, Select
+ Add- Select the desired computer, user, group, etc
- Select
Add
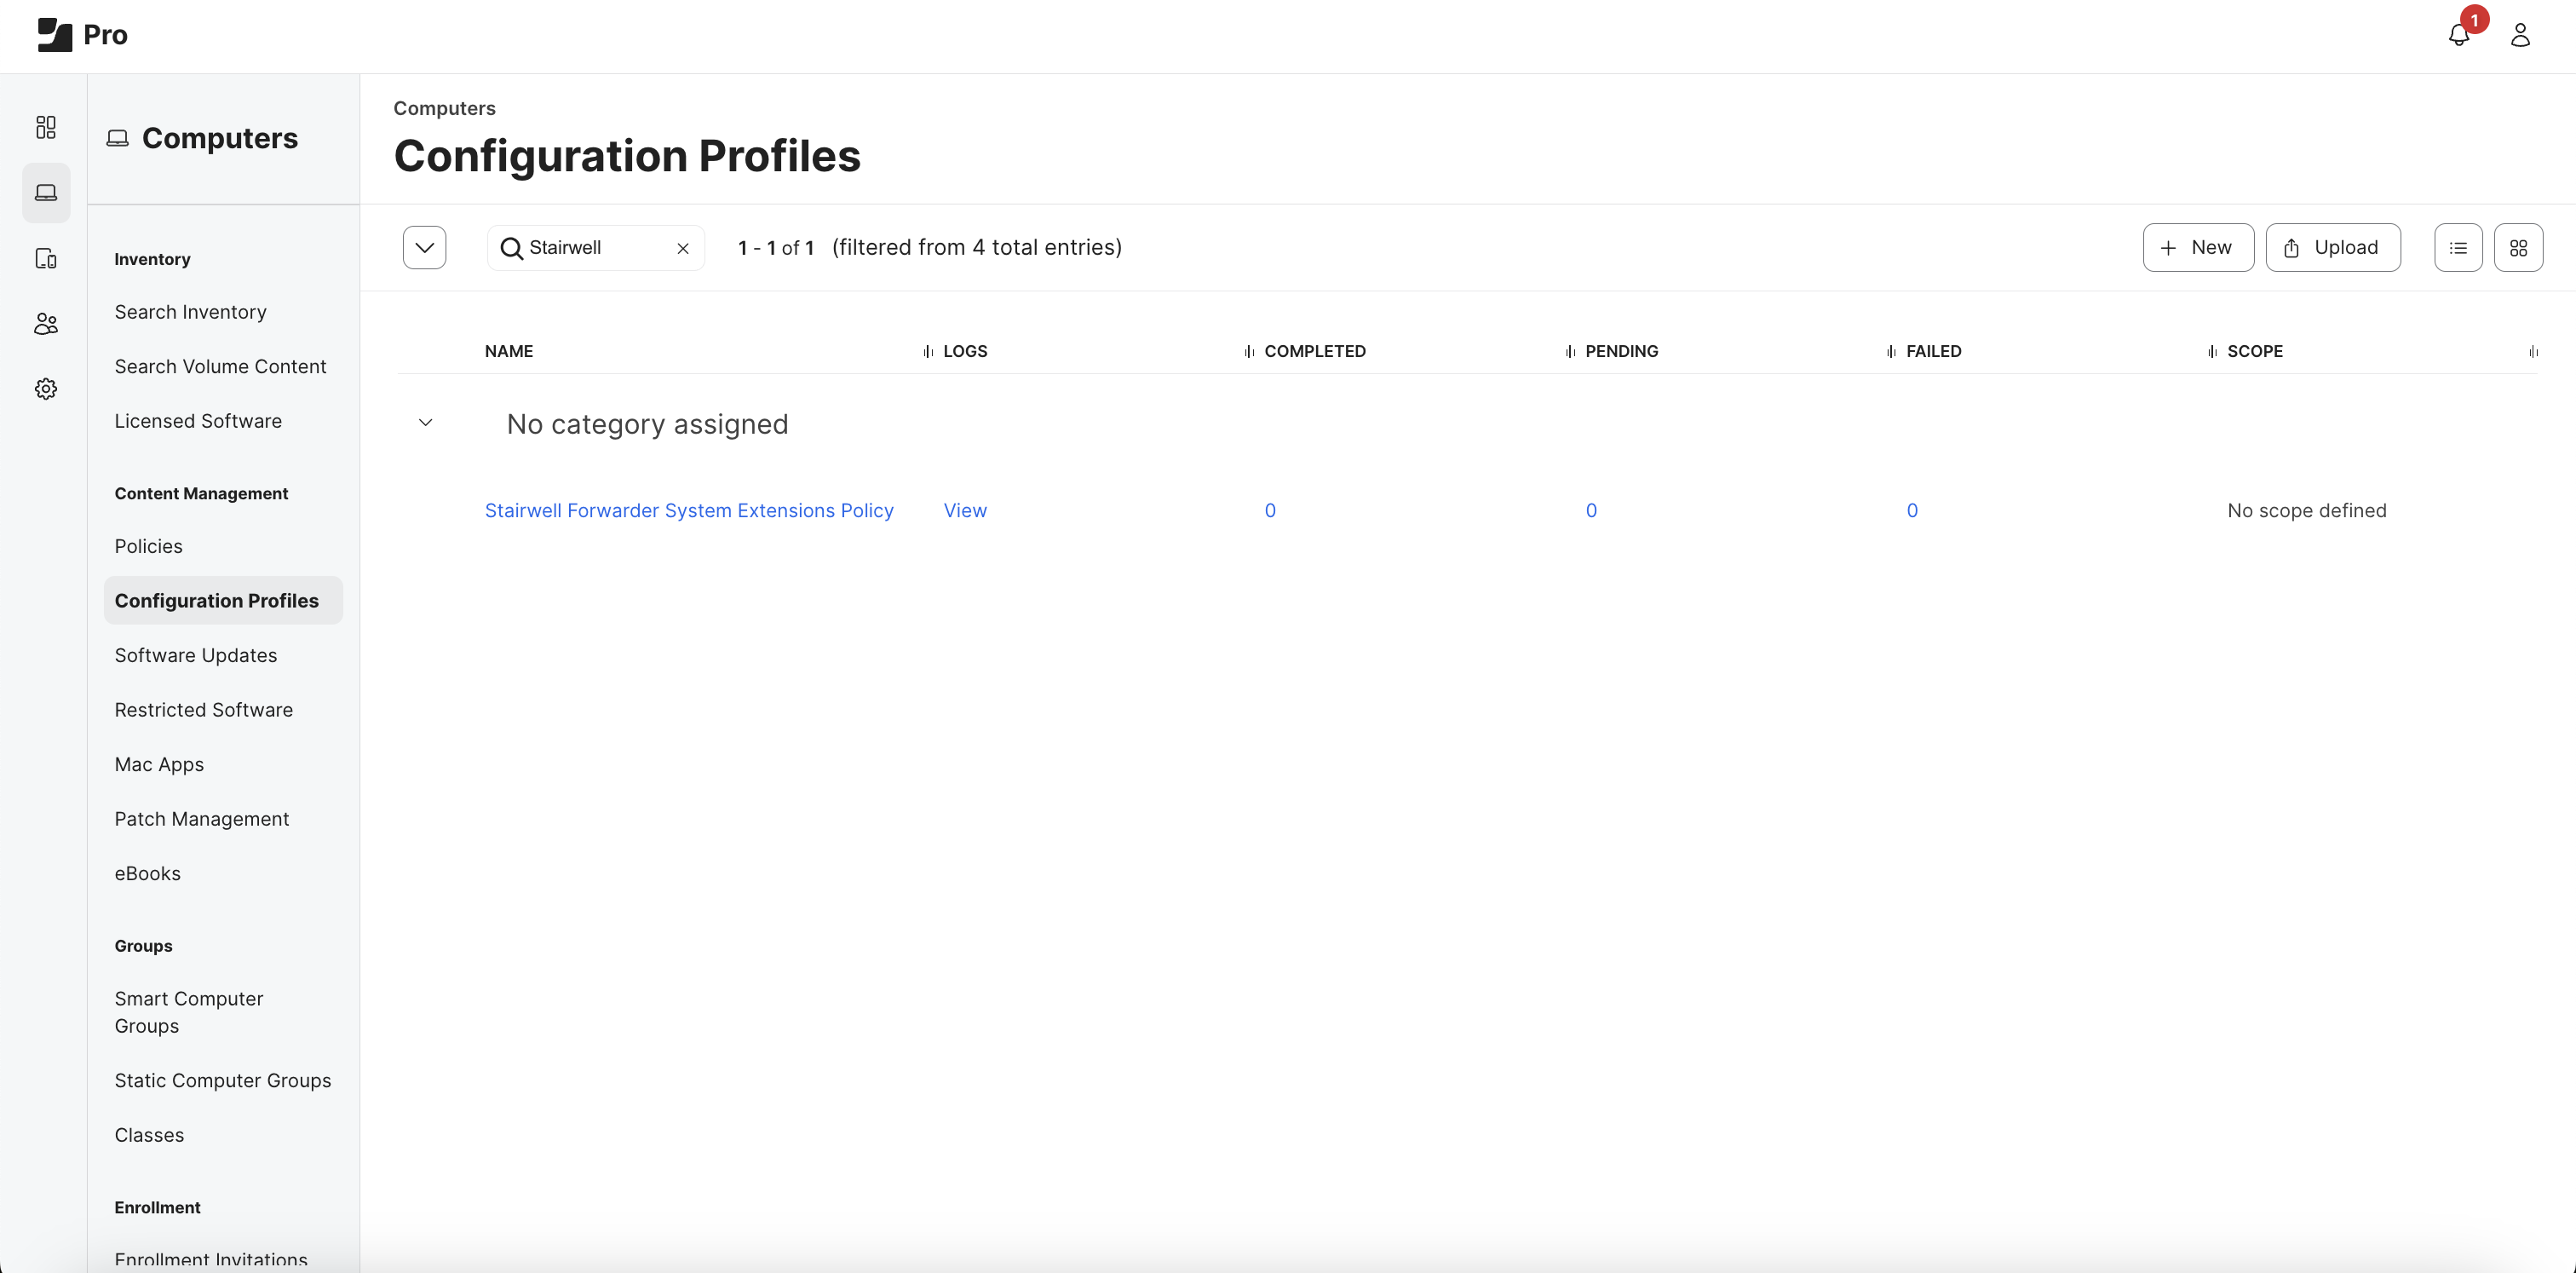
- Select 💾
Save
Optional System Extension TypeInstead of selecting "Allowed System Extensions", you can select "Allow Team Identifiers" and skip the Allows System Extension setup. This is a less restrictive setting.
1B. Create Privacy Policy
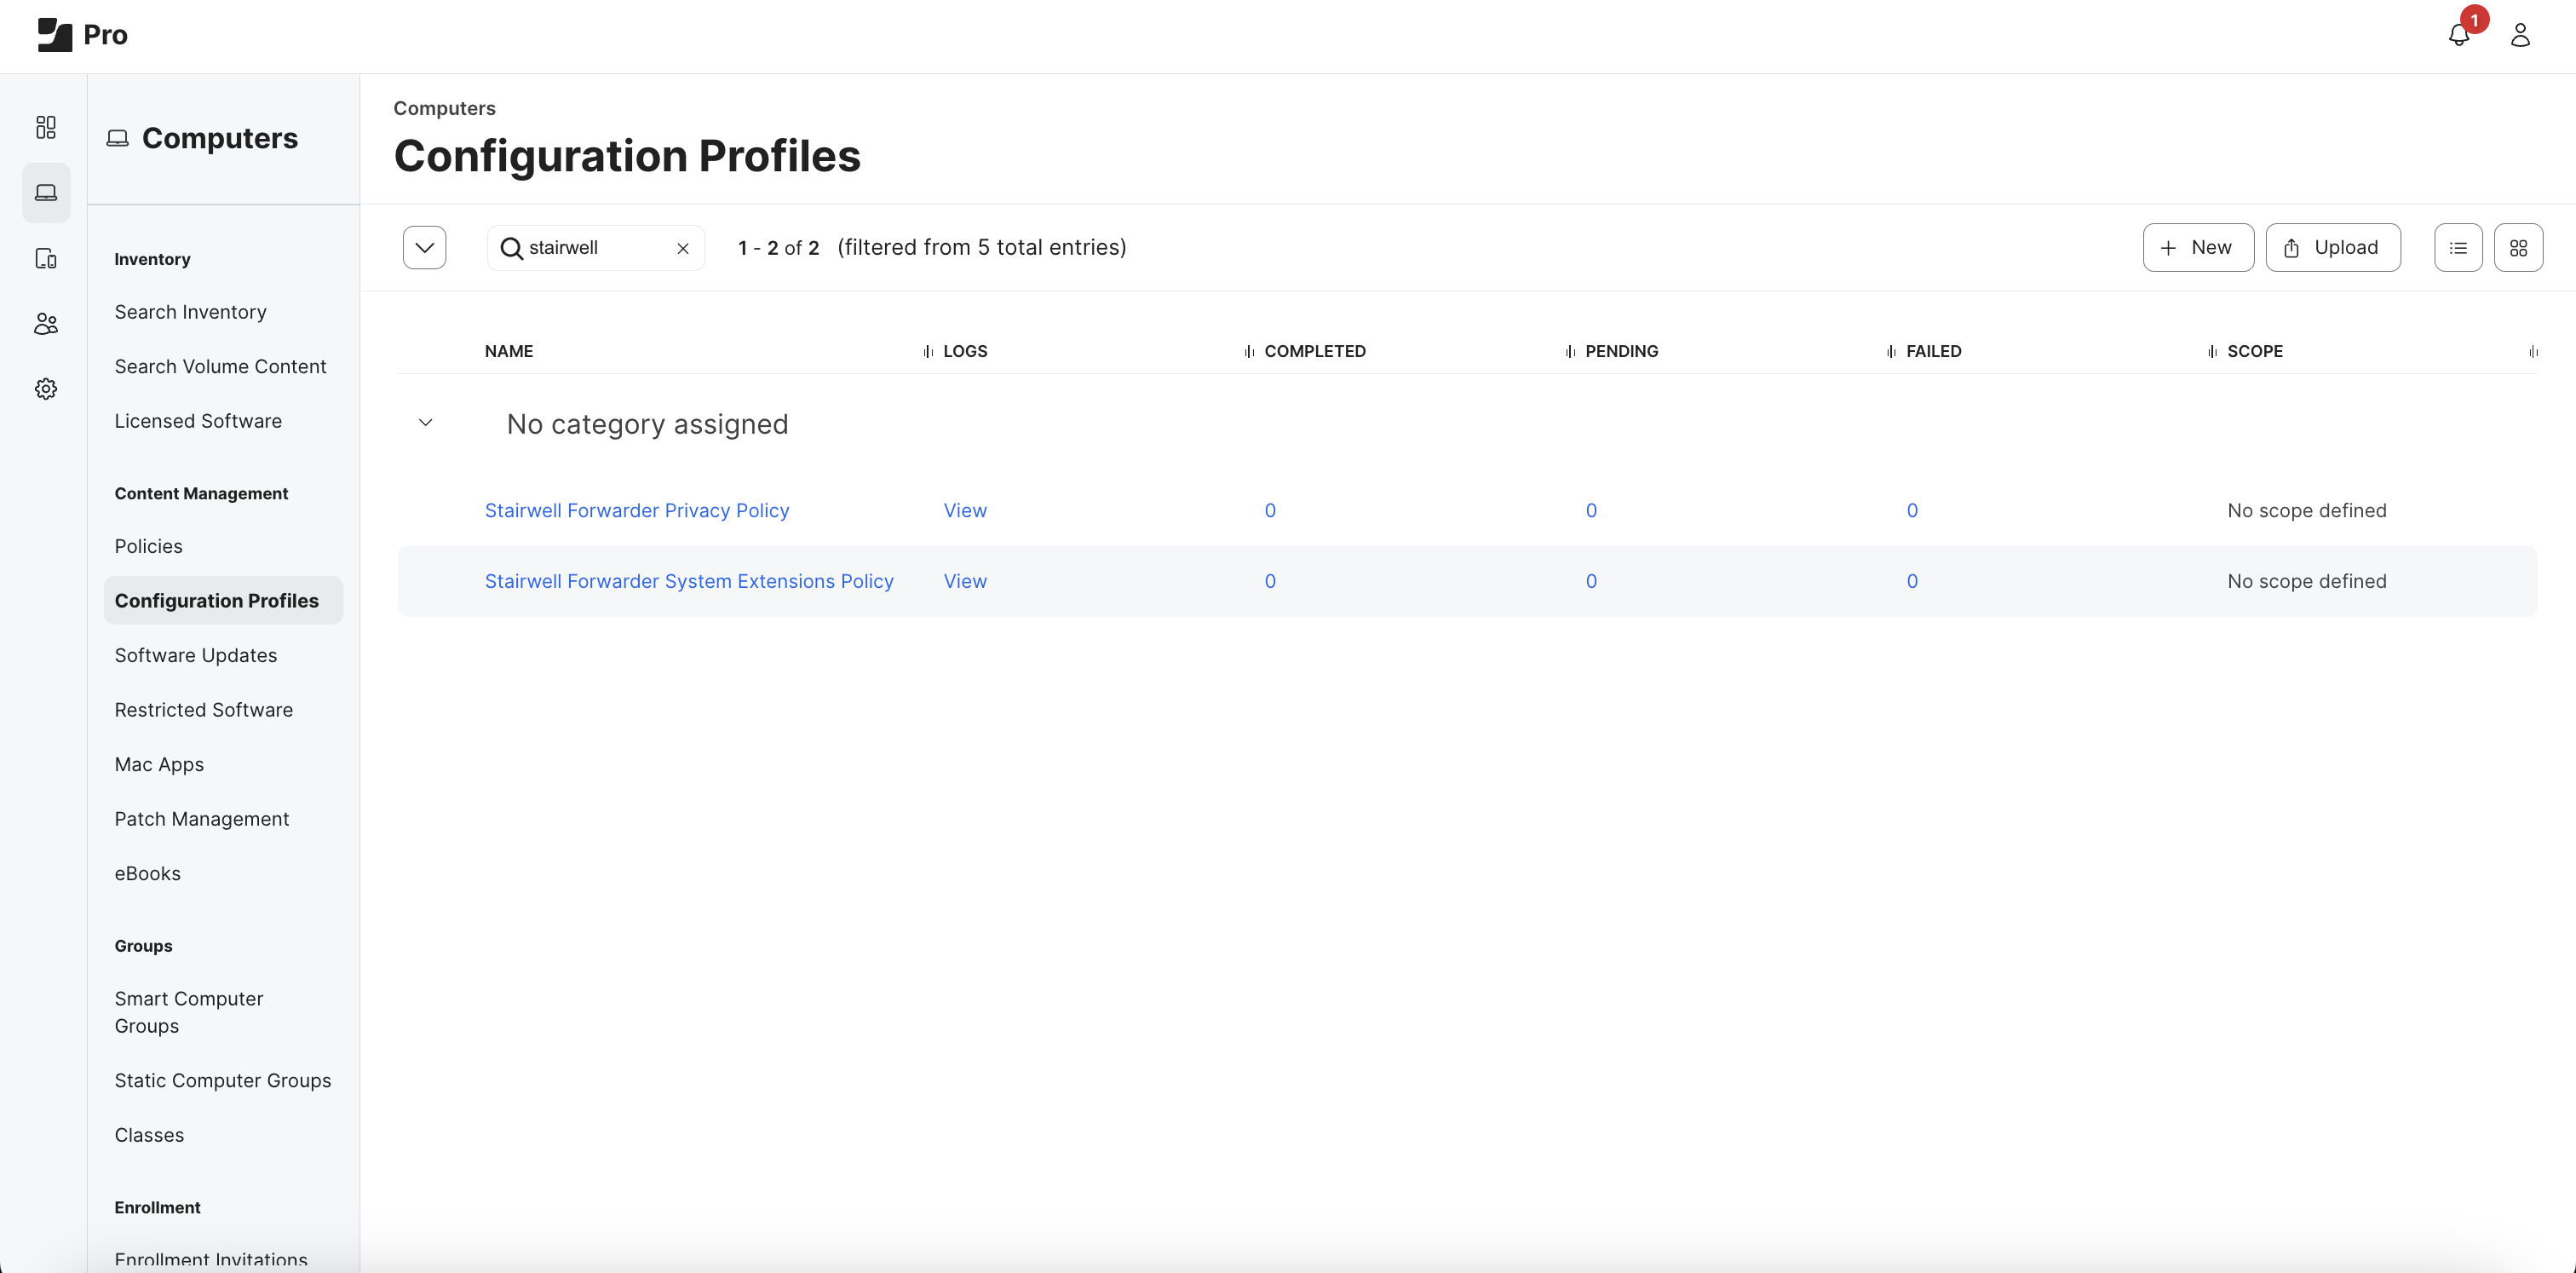
- Under Content Management, Select
Configuration Profiles - Select
+ Newin top right
- Under Options ➡️ General
- Name:
Stairwell Forwarder Privacy Policy - Level:
Computer Level - Distribution Method:
Install Automatically
- Name:

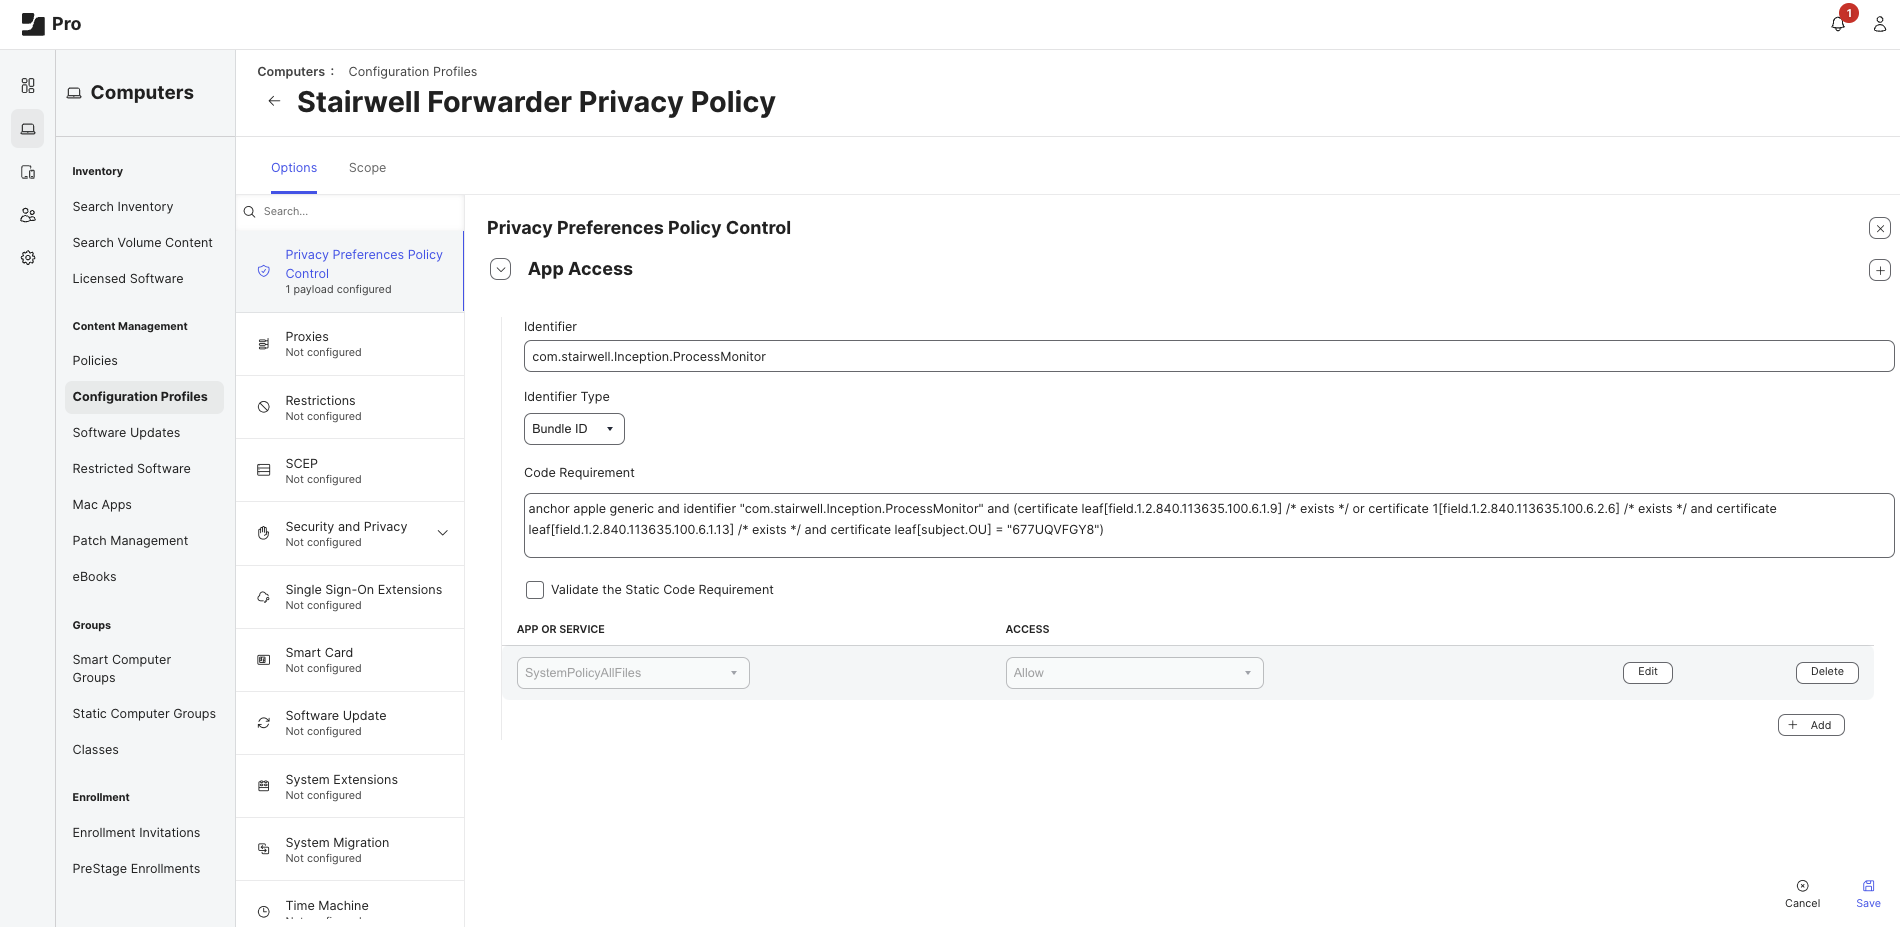
- Under Options ➡️ Privacy Preferences Policy Control, Select
Configure- Identifier:
com.stairwell.Inception.ProcessMonitor - Identifier Type:
Bundle ID - Code Requirement:
anchor apple generic and identifier "com.stairwell.Inception.ProcessMonitor" and (certificate leaf[field.1.2.840.113635.100.6.1.9] /* exists */ or certificate 1[field.1.2.840.113635.100.6.2.6] /* exists */ and certificate leaf[field.1.2.840.113635.100.6.1.13] /* exists */ and certificate leaf[subject.OU] = "677UQVFGY8")
- Identifier:
- Under APP OR SERVICE, Select
+ Add- Select
SystemPolicyAllFiles - Select
Allow - Select
Save
- Select
- Under Options ➡️ Scope ➡️ Selected Deployment Targets, Select
+ Add- Select the desired computer, user, group, etc
- Select
Add
- Select 💾
Save
1C. Create Application Settings Policy
- Under Content Management, Select
Configuration Profiles - Select
+ Newin top right
- Under Options ➡️ General
- Name:
Stairwell Forwarder Settings Policy - Level:
Computer Level - Distribution Method:
Install Automatically
- Name:

-
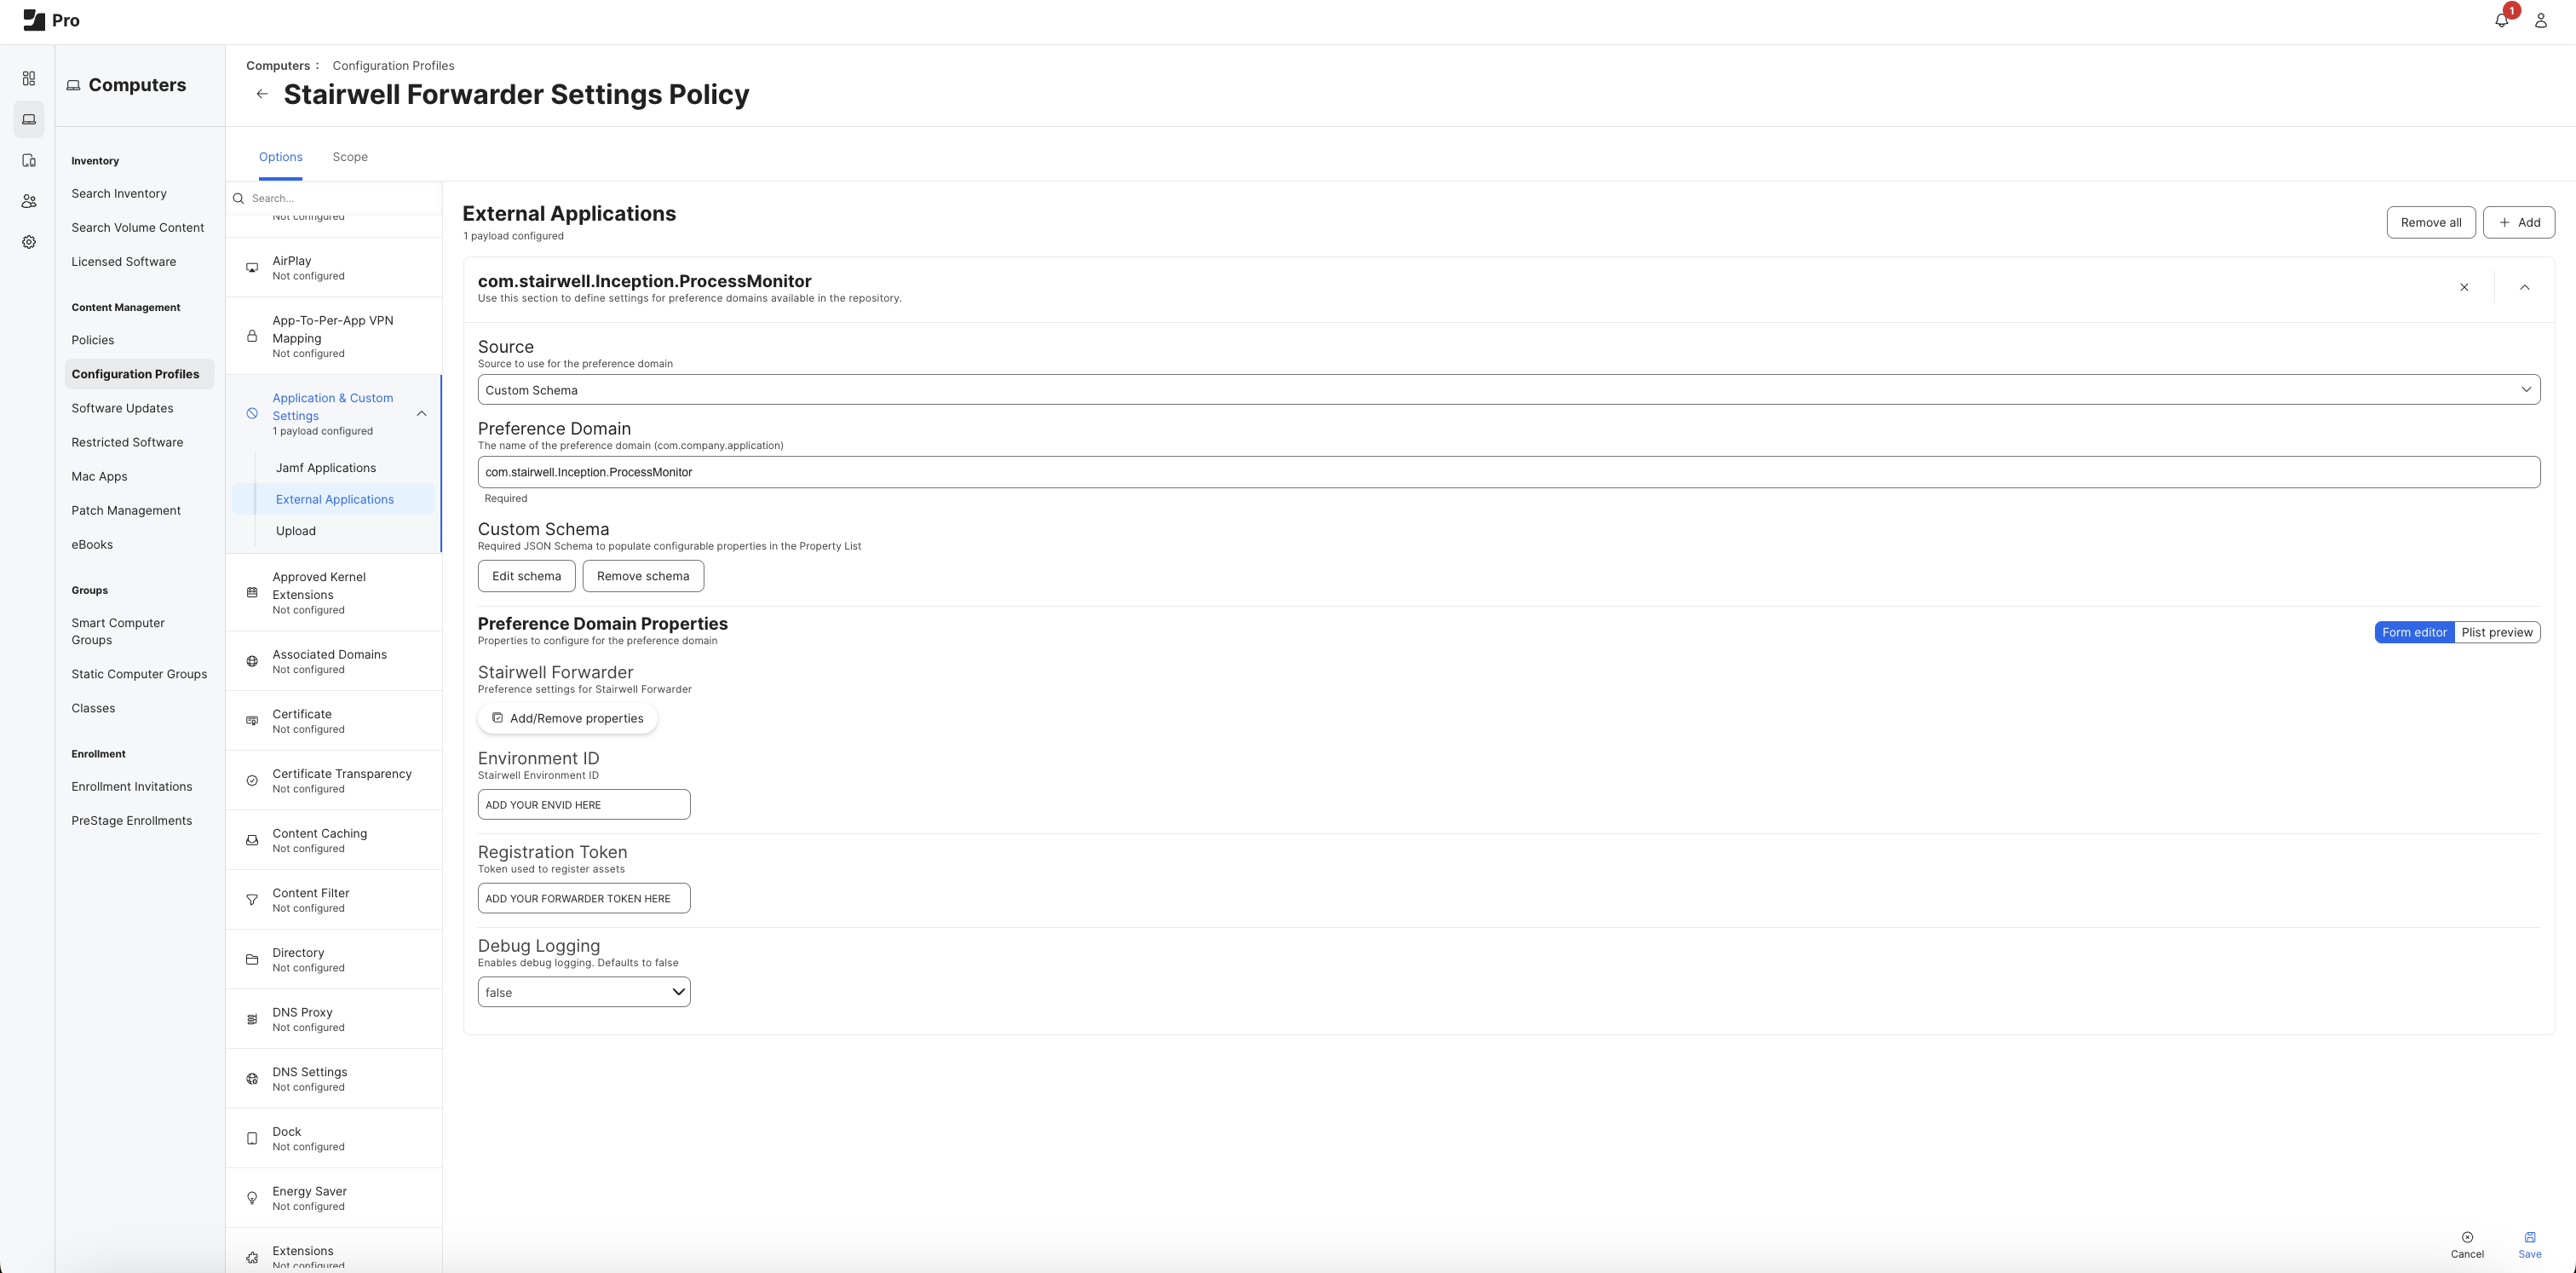
Under Options ➡️ Applications & Custom Settings ➡️ External Applications, Select
+ Add- Source:
Custom Schema - Preference Domain:
com.stairwell.Inception.ProcessMonitor - Select
+ Add schemaunder Custom Schema
{ "description": "Preference settings for Stairwell Forwarder", "title": "Stairwell Forwarder", "properties": { "EnvId": { "title": "Environment ID", "description": "Stairwell Environment ID", "property_order": 5, "type": "string" }, "RegistrationToken": { "title": "Registration Token", "description": "Token used to register assets", "property_order": 10, "type": "string" }, "Debug": { "title": "Debug Logging", "description": "Enables debug logging. Defaults to false", "property_order": 75, "type": "boolean" } } }- Environment ID:
Environment ID - Registration Token:
File Forwarder Token - Debug Logging:
false
- Source:
-
Under Options ➡️ Scope ➡️ Selected Deployment Targets, Select
+ Add- Select the desired computer, user, group, etc
- Select
Add
-
Select 💾
Save
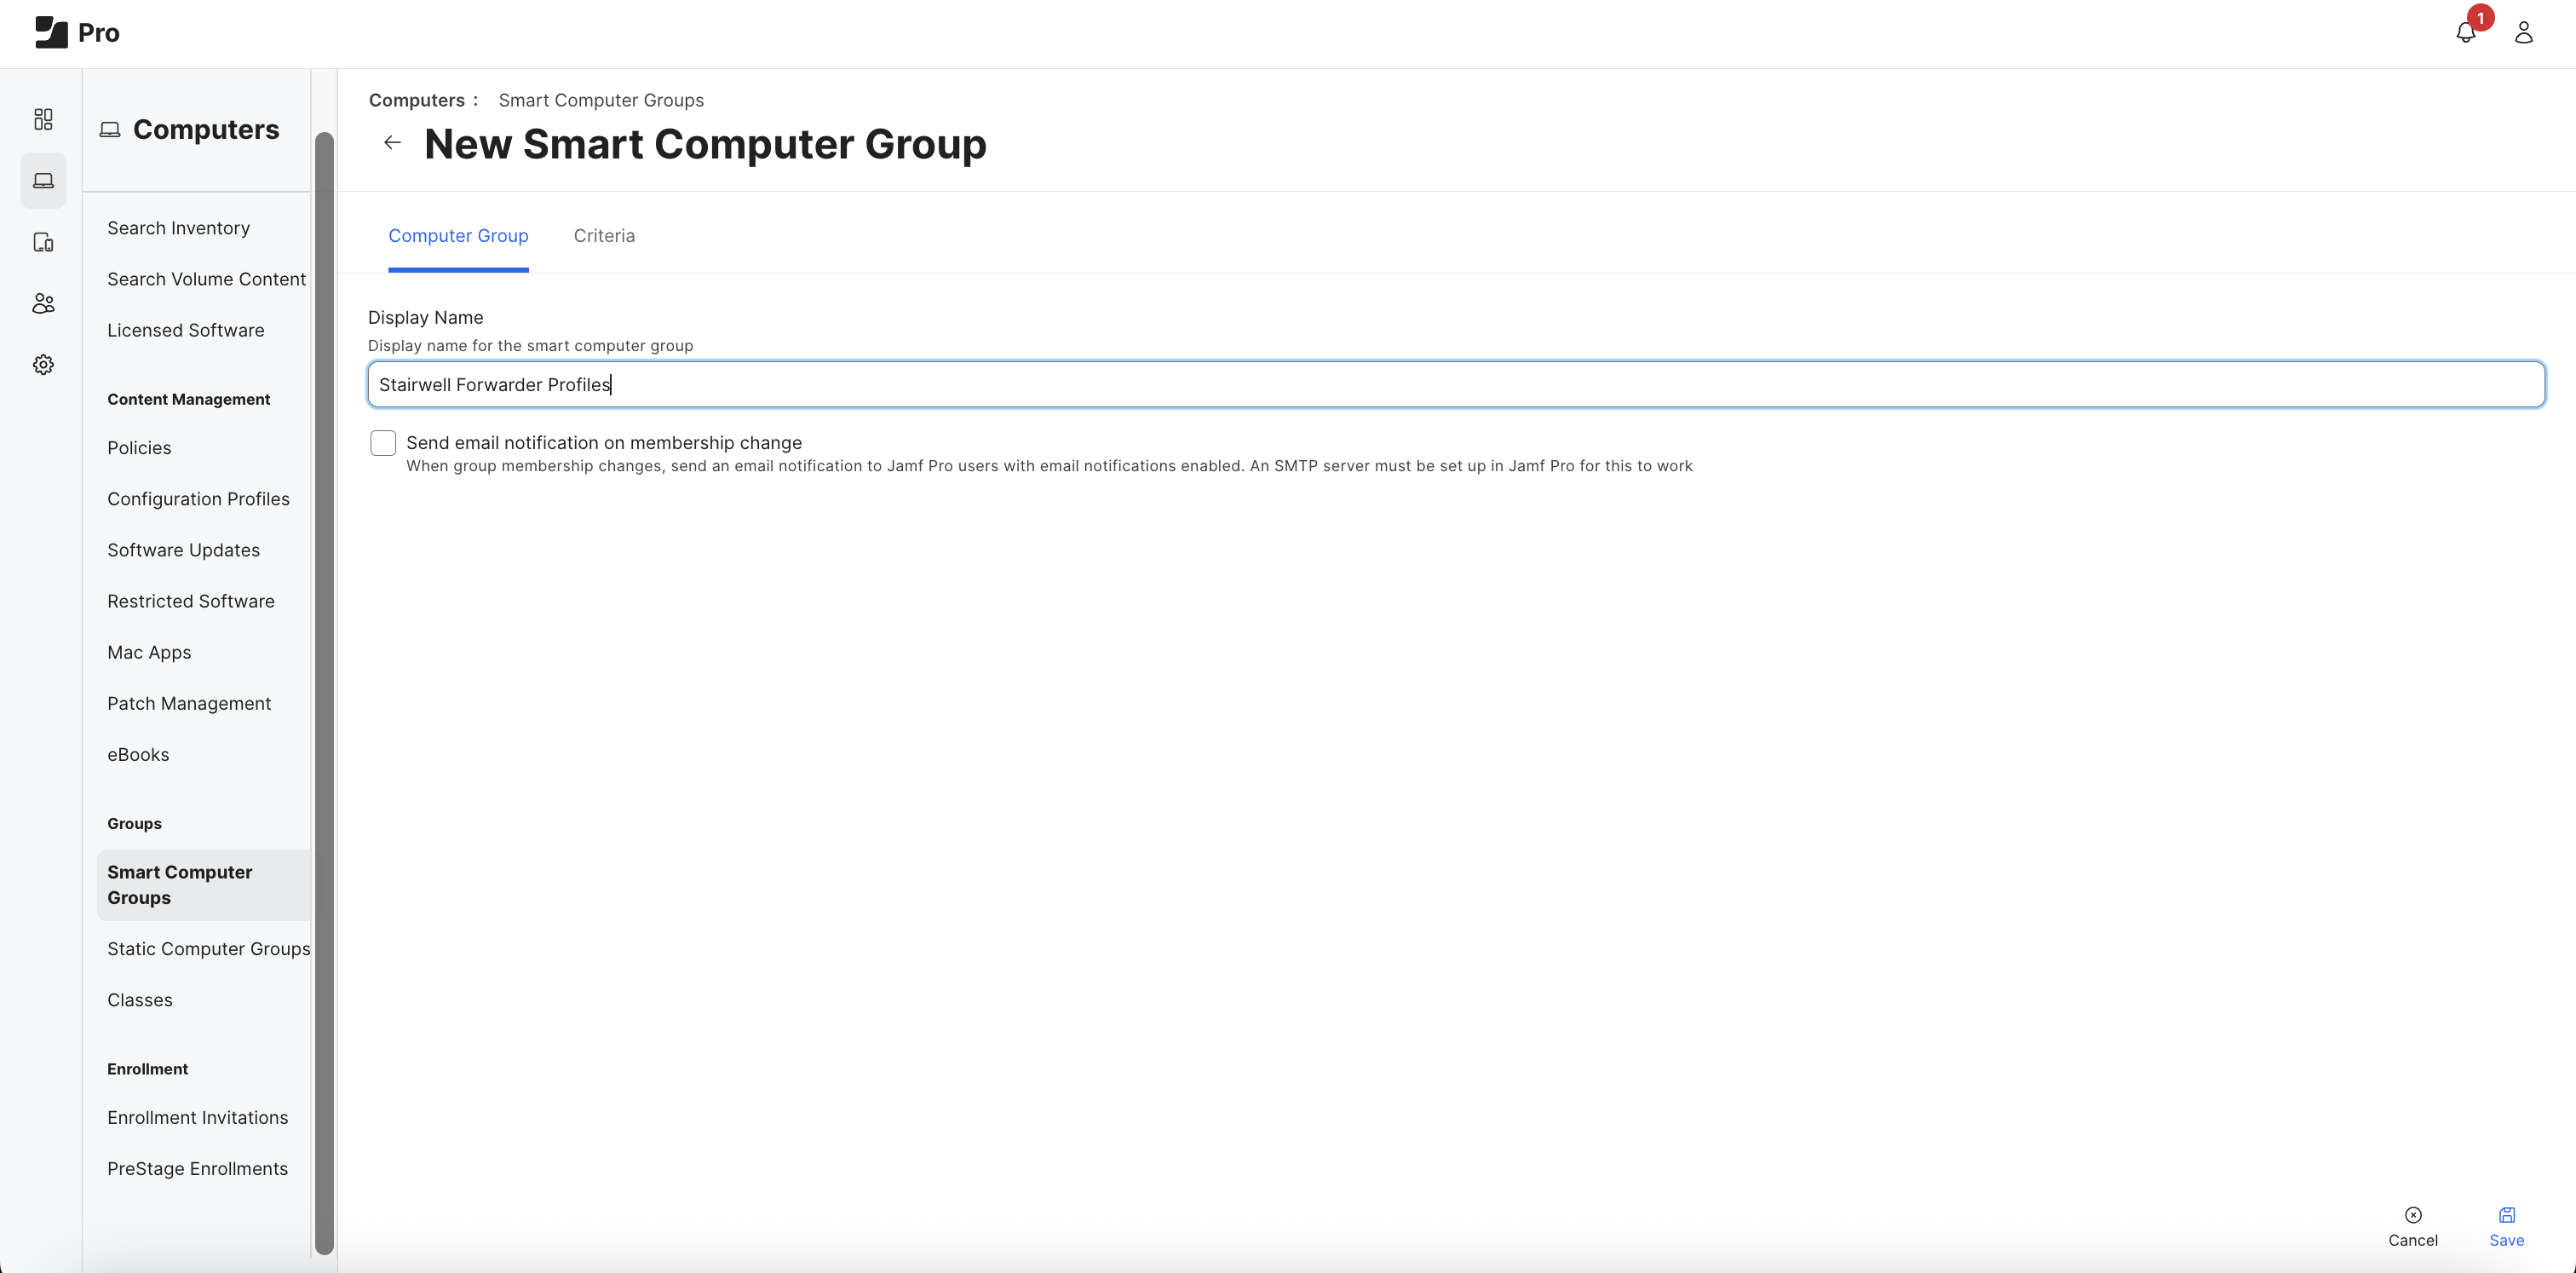
2. Create Smart Computer Group
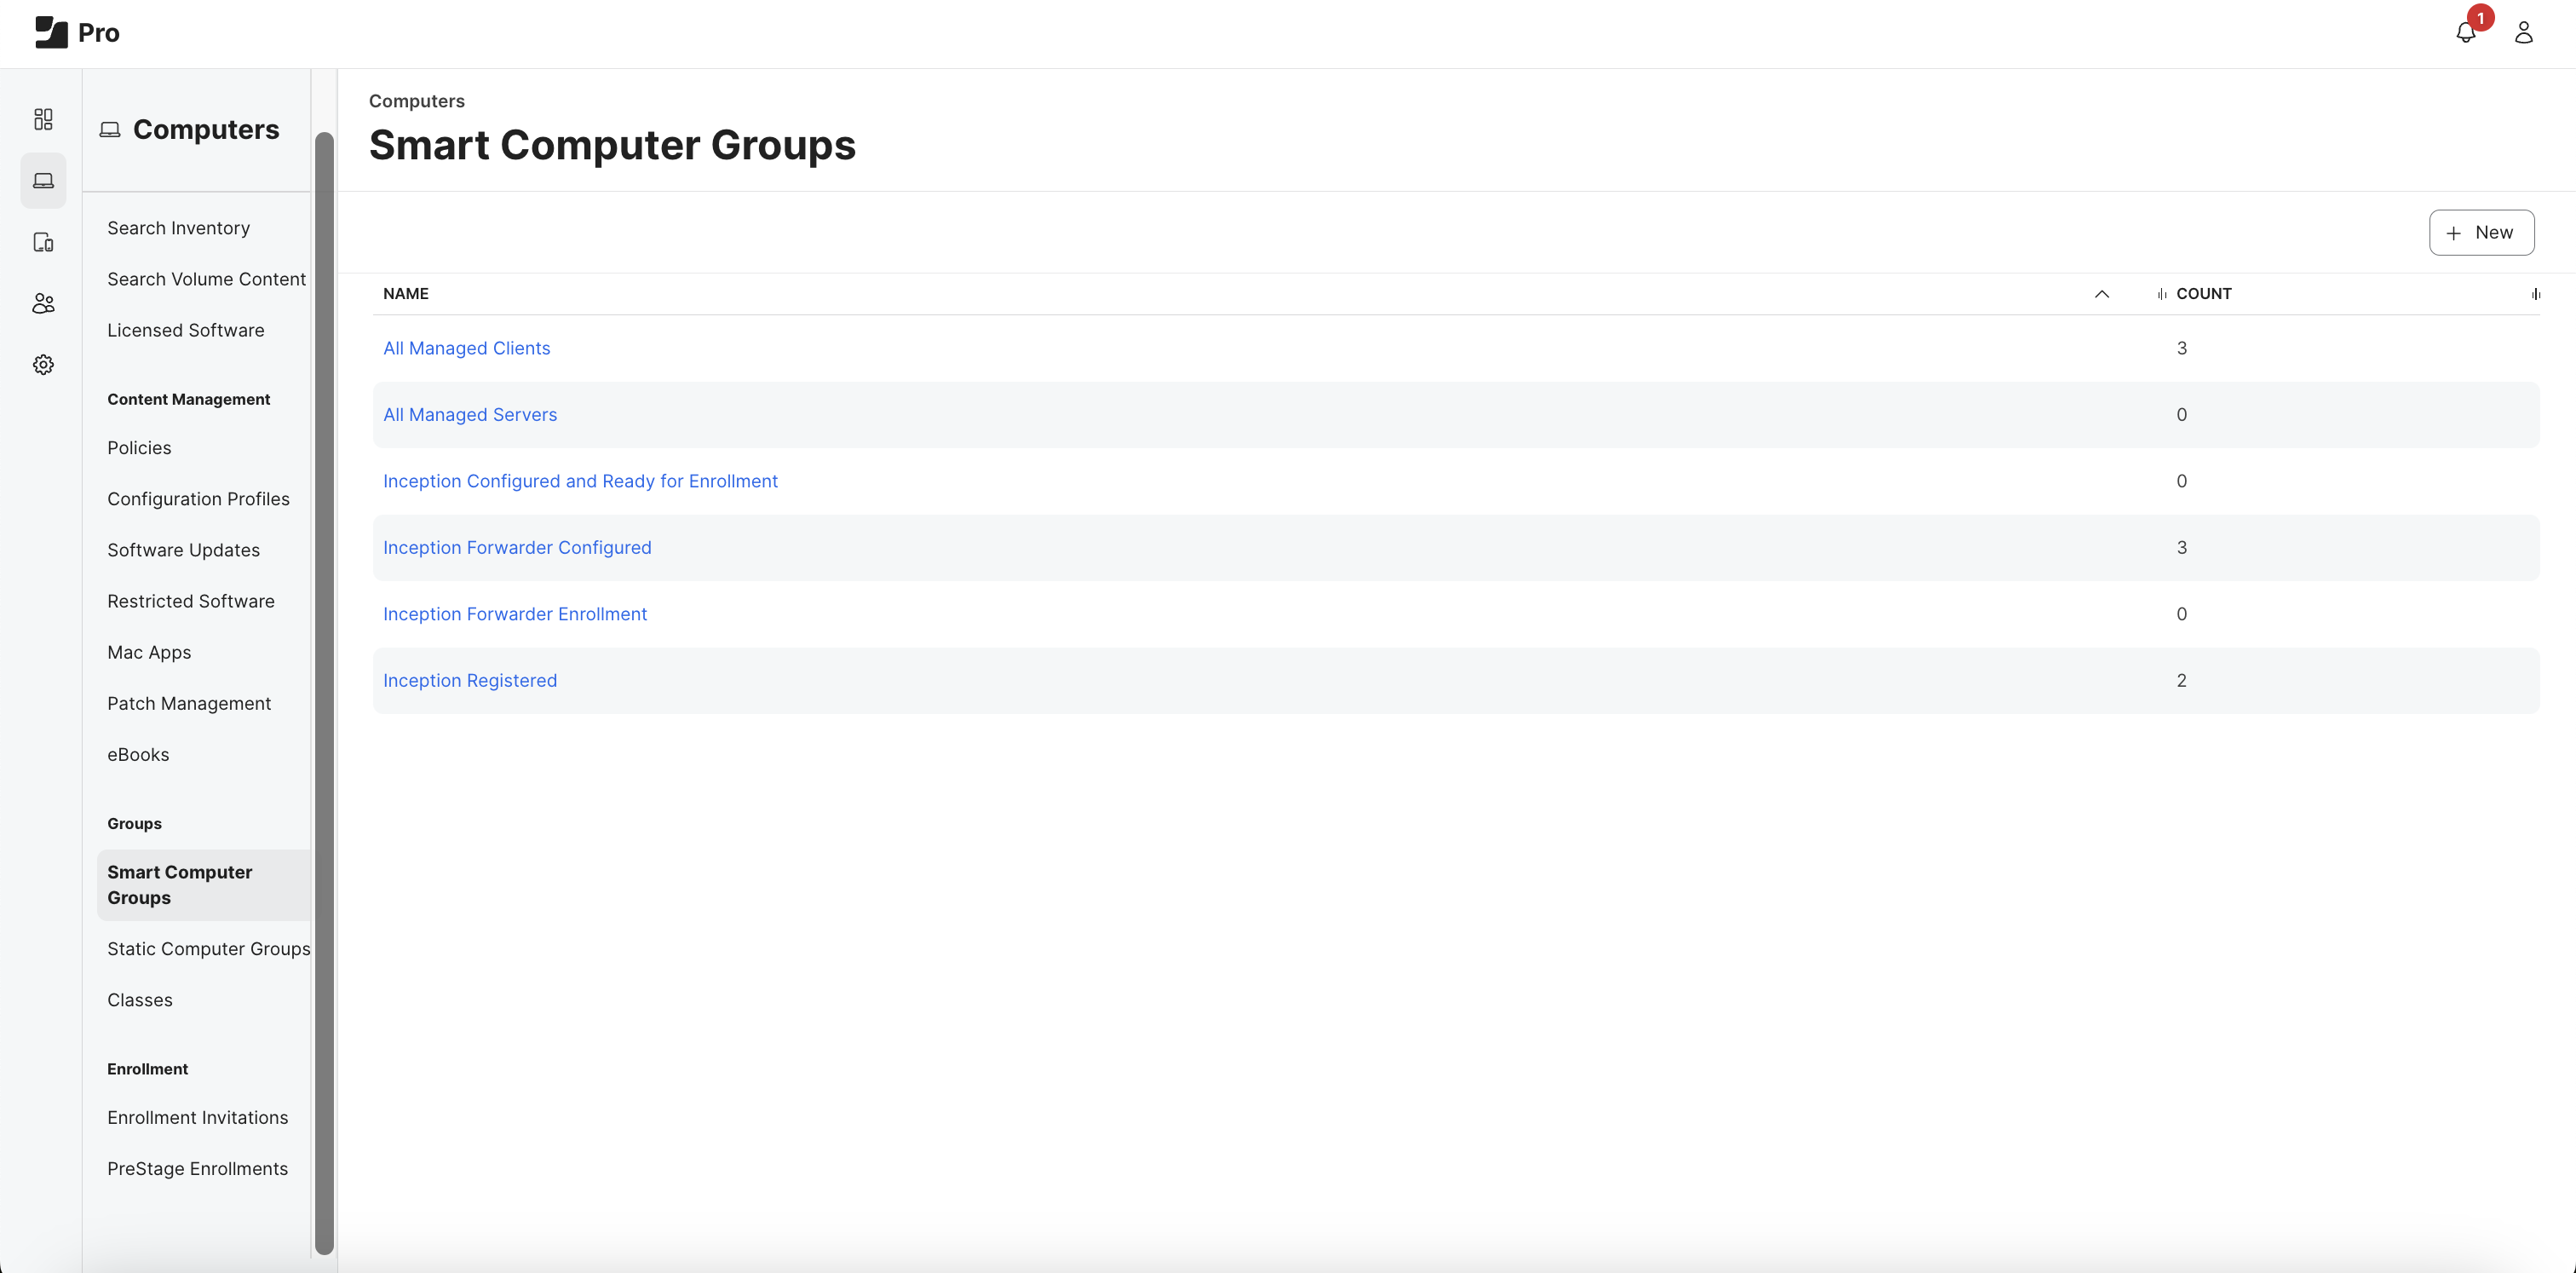
- Under Computers ➡️ Groups, Select
Smart Computer Groups - Select
+ New
- Under Computer Group
- Display Name:
Stairwell Forwarder Profiles
- Display Name:
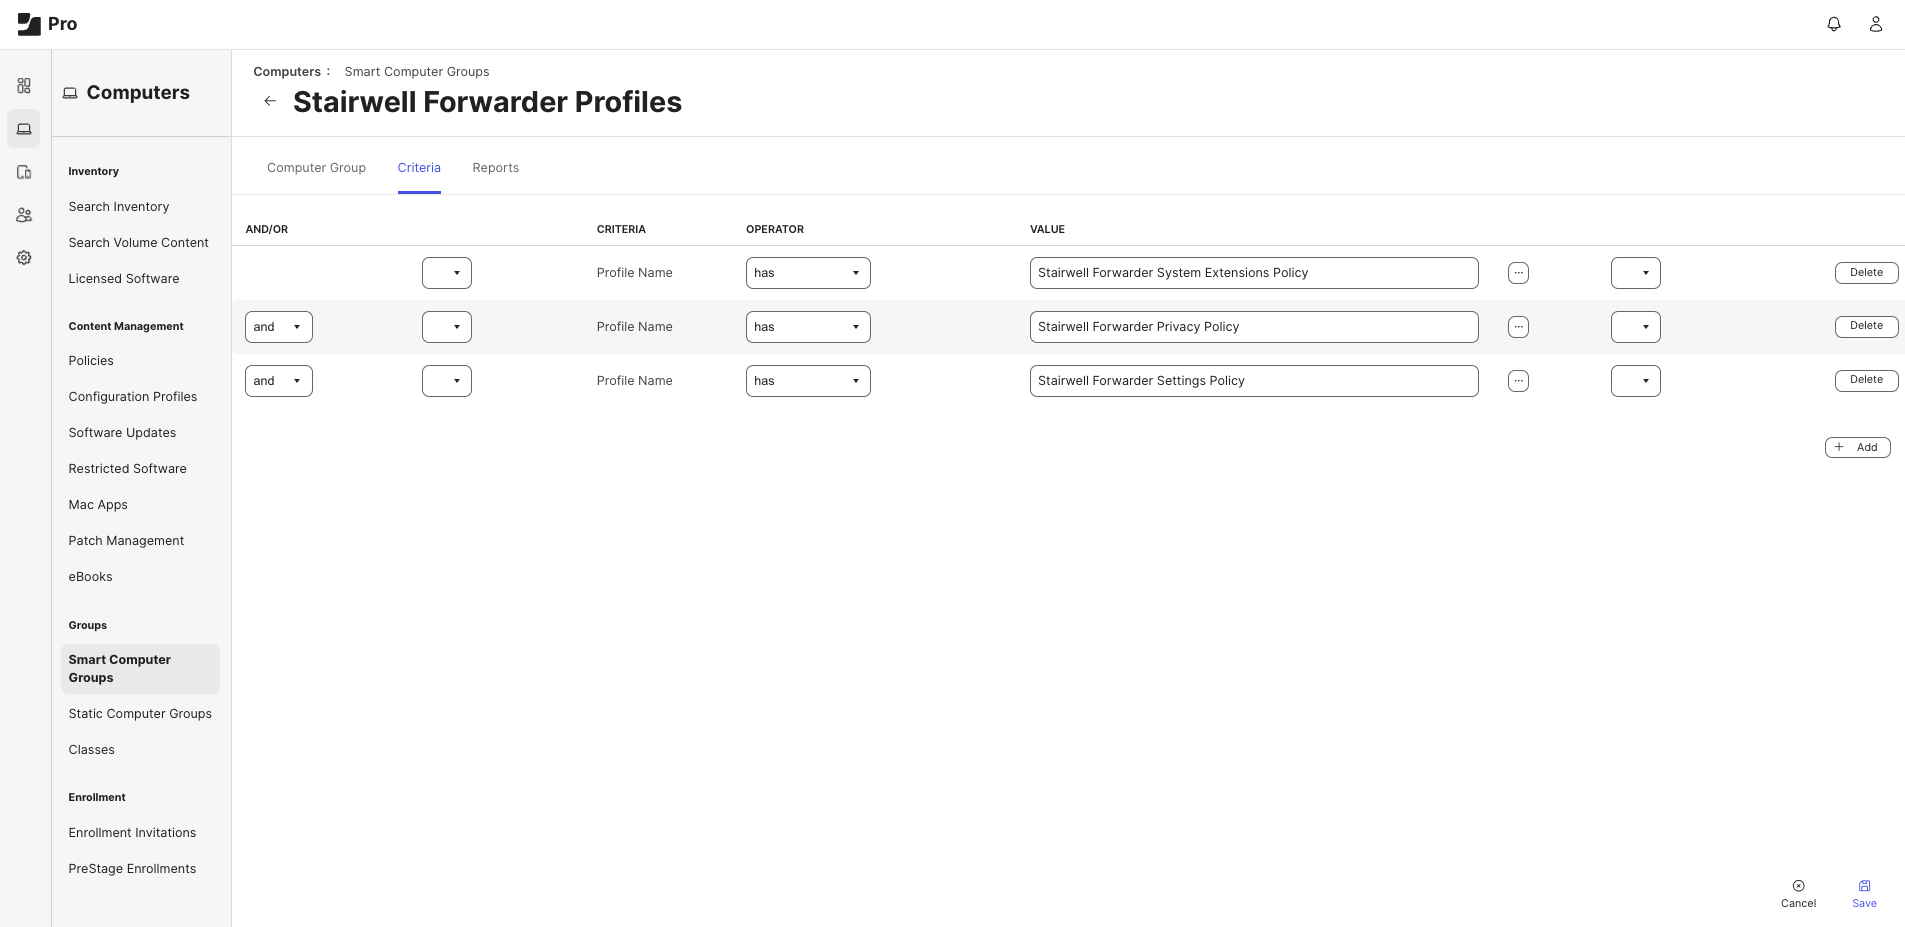
- Under Criteria, Select
+ Add - Select
Show Advanced Criteria - Find
Profile Nameand SelectChoose(repeat this 2 more times)

- Under Criteria
- Operator:
Has - Value:
Stairwell Forwarder System Extensions Policy - AND/OR:
and - Operator:
Has - Value:
Stairwell Forwarder Privacy Policy - AND/OR:
and - Operator:
Has - Value:
Stairwell Forwarder Settings Policy
- Operator:
- Select 💾
Save
3. Create Application Package
- Download the latest MacOS Forwarder package
- Under Settings ➡️ Computer Management, Select
Packages - Select
+ New
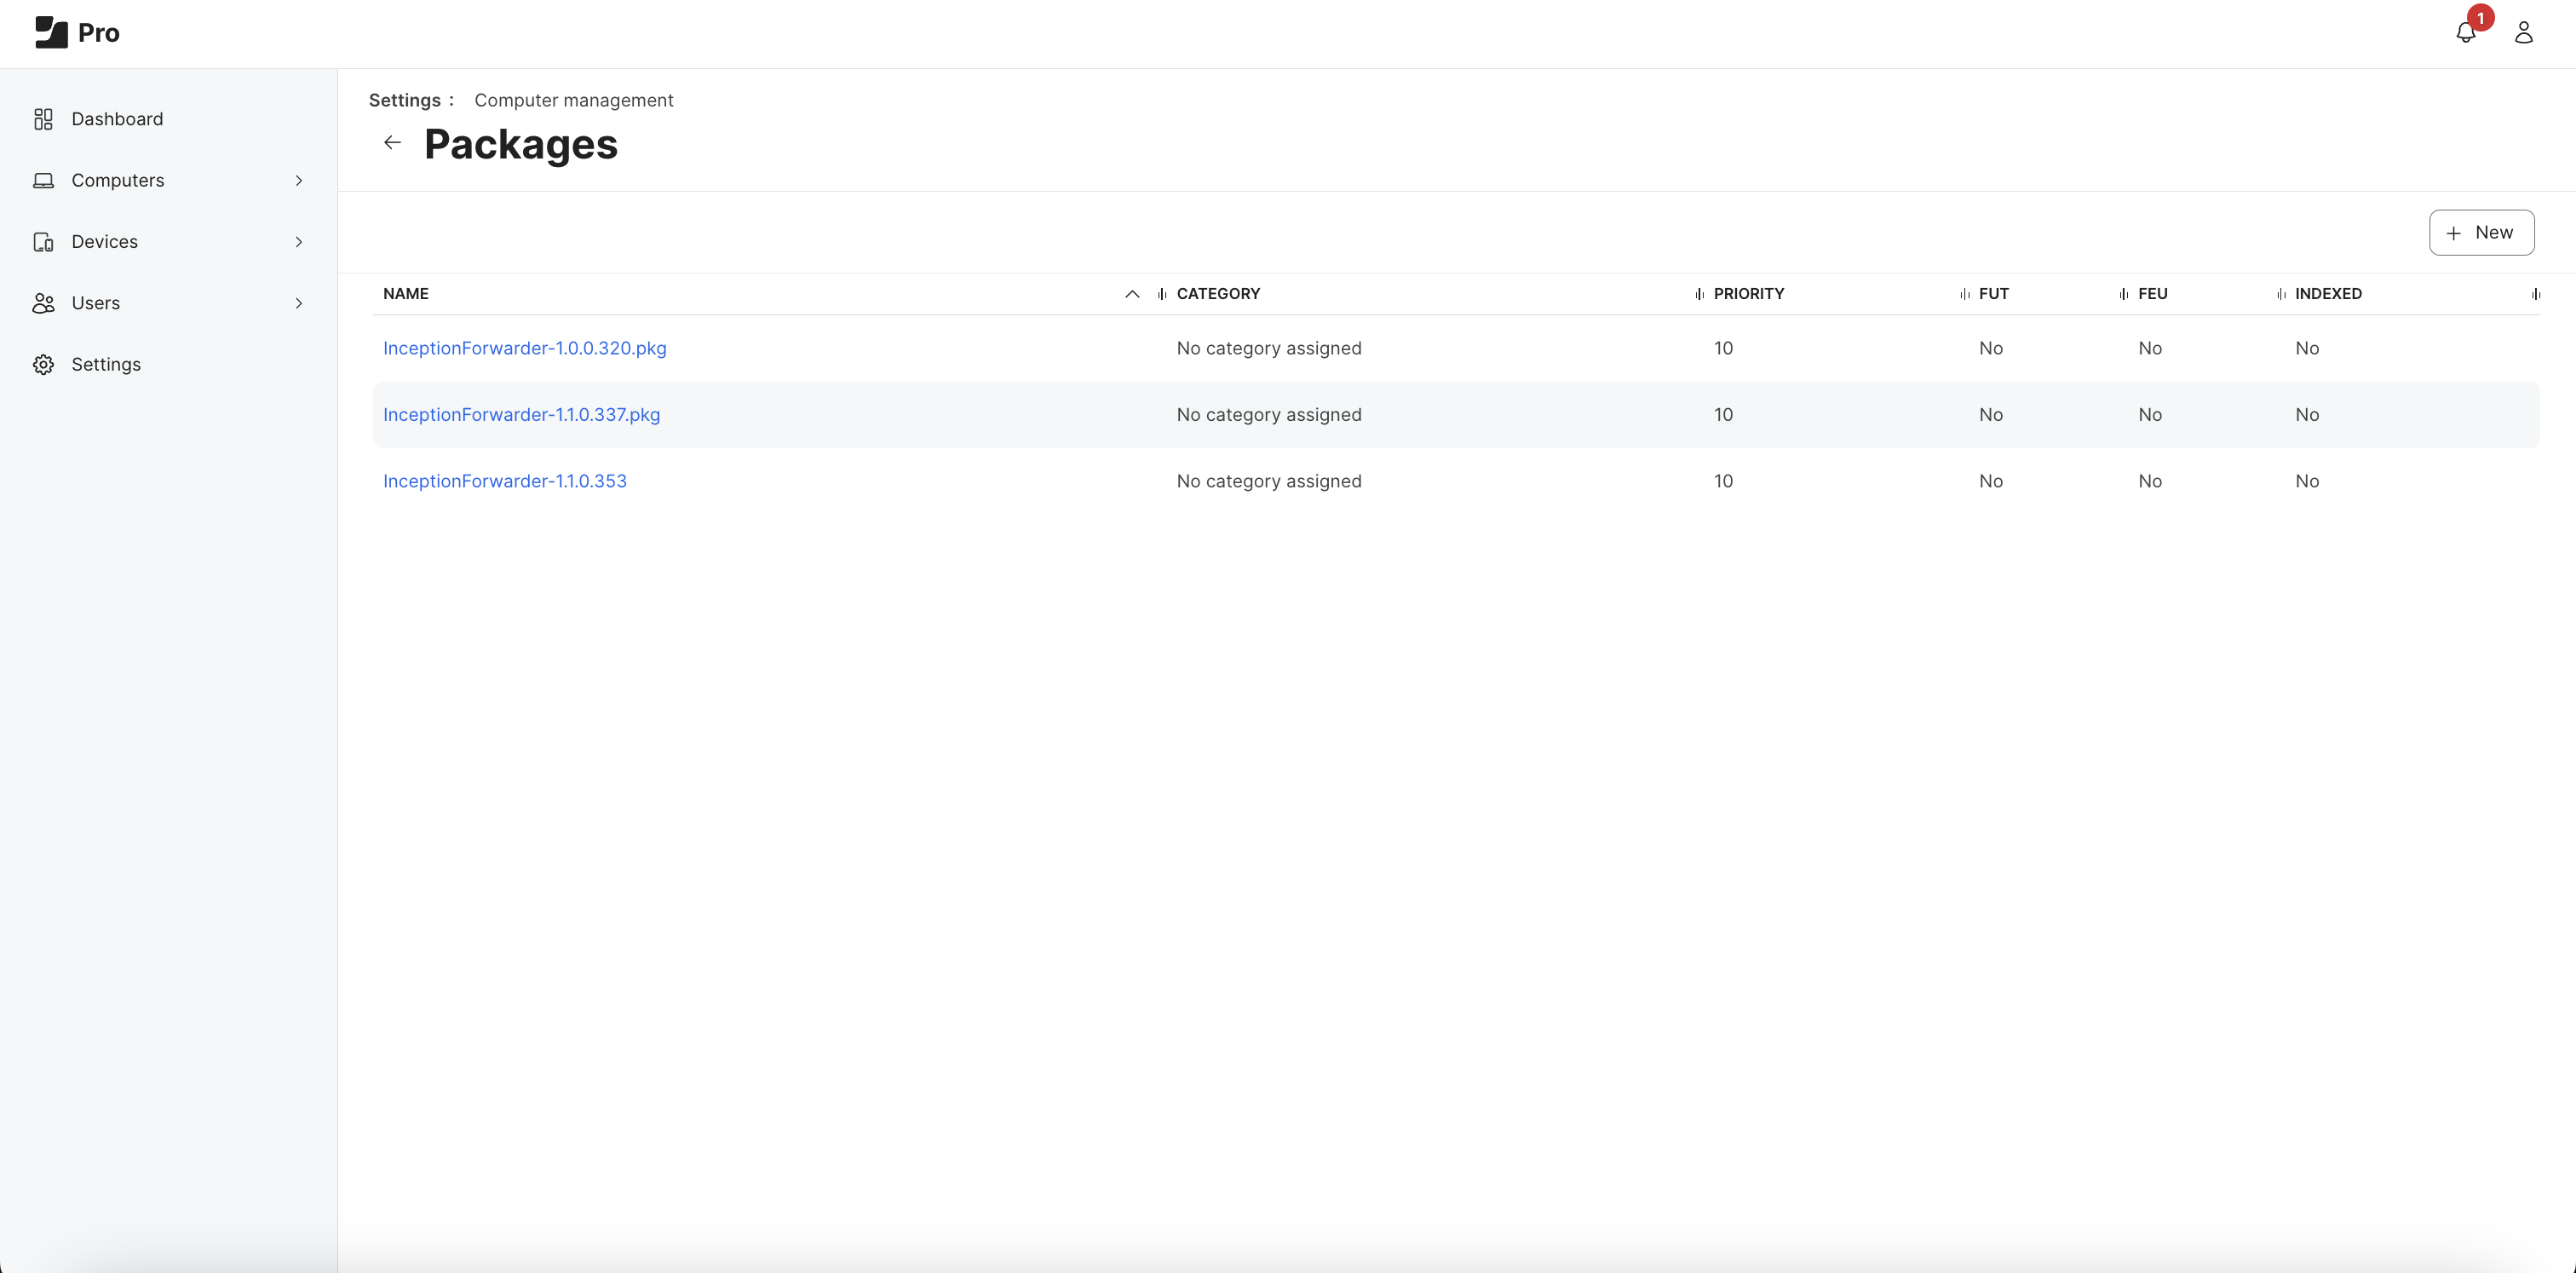
- Under General ➡️ Filename, Select
Choose File - Select the downloaded package
- Select 💾
Save

Upload failed: undefined errorIf you encounter this error, please check the Cloud Services Connection.
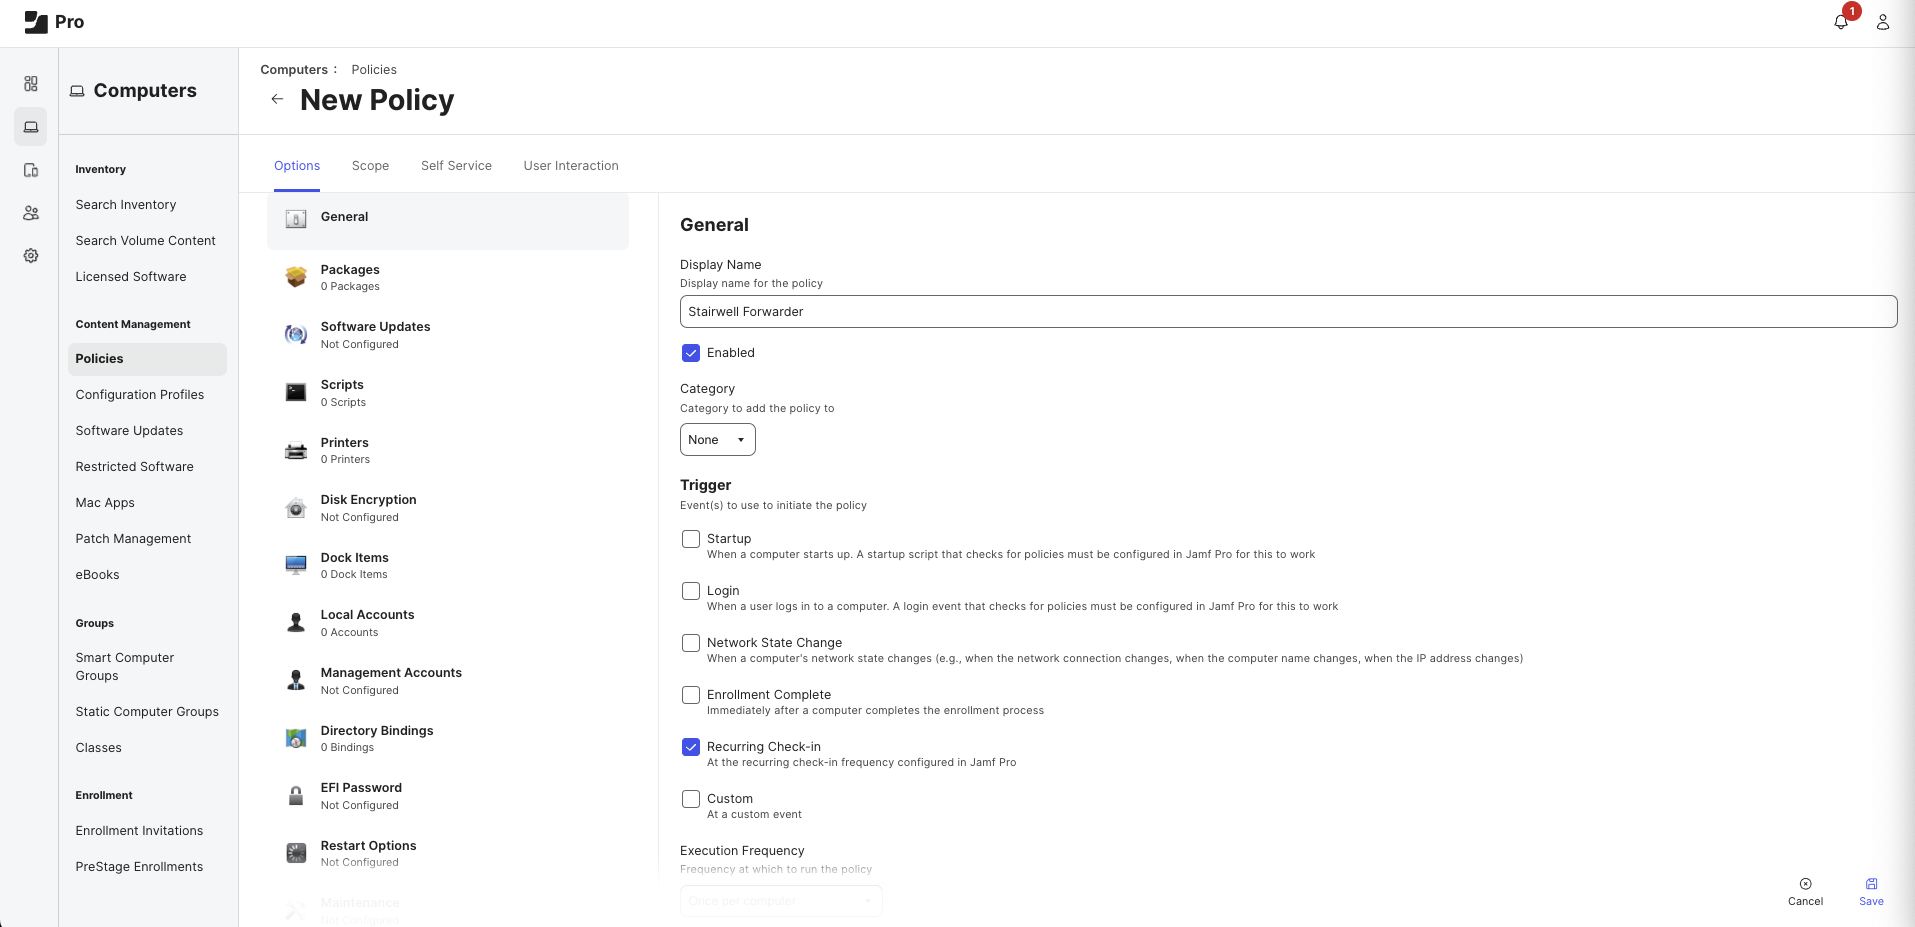
4. Create New Policy
- Under Computers ➡️ Content Management, Select
Policies - Select
+ New - Under Options ➡️ General
- Display Name:
Stairwell Forwarder - Enabled: ☑️
- Trigger:
Recurring Check-in
- Display Name:
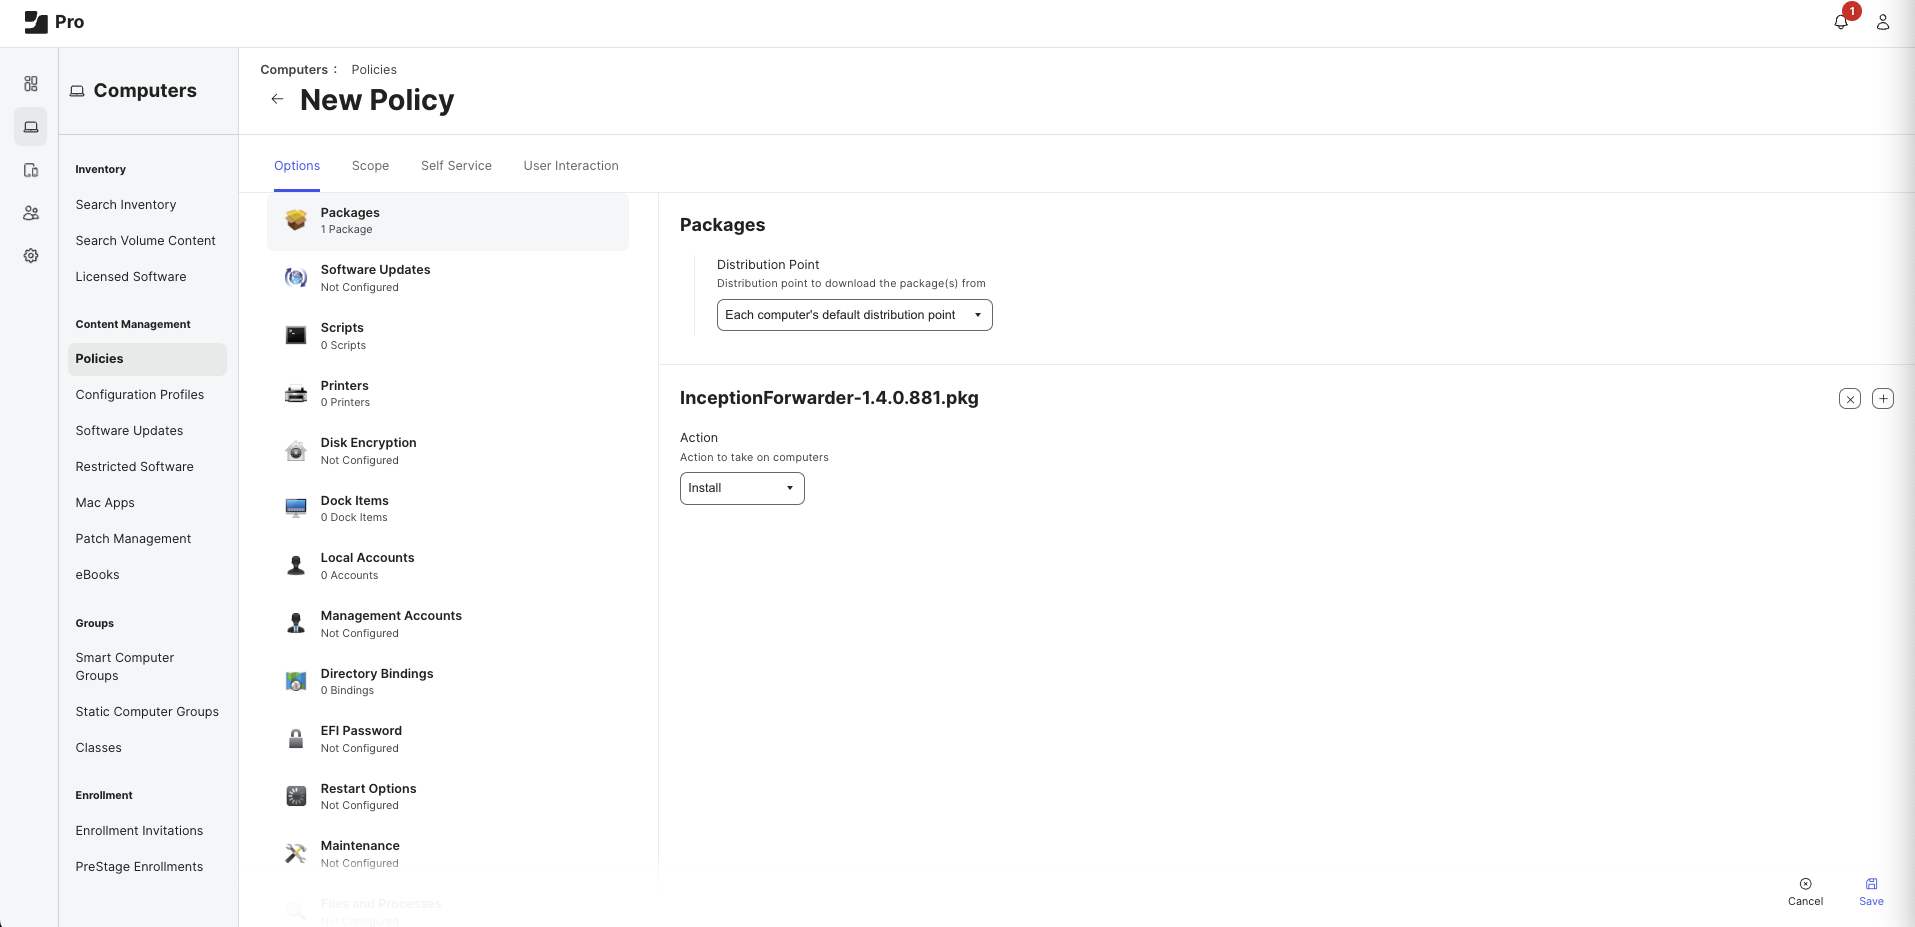
- Under Options ➡️ Packages
- Select
Configure - Find the package created in Step 3, Select
Add - Distribution Point:
Each computer's default distribution point - Action:
Install
- Select
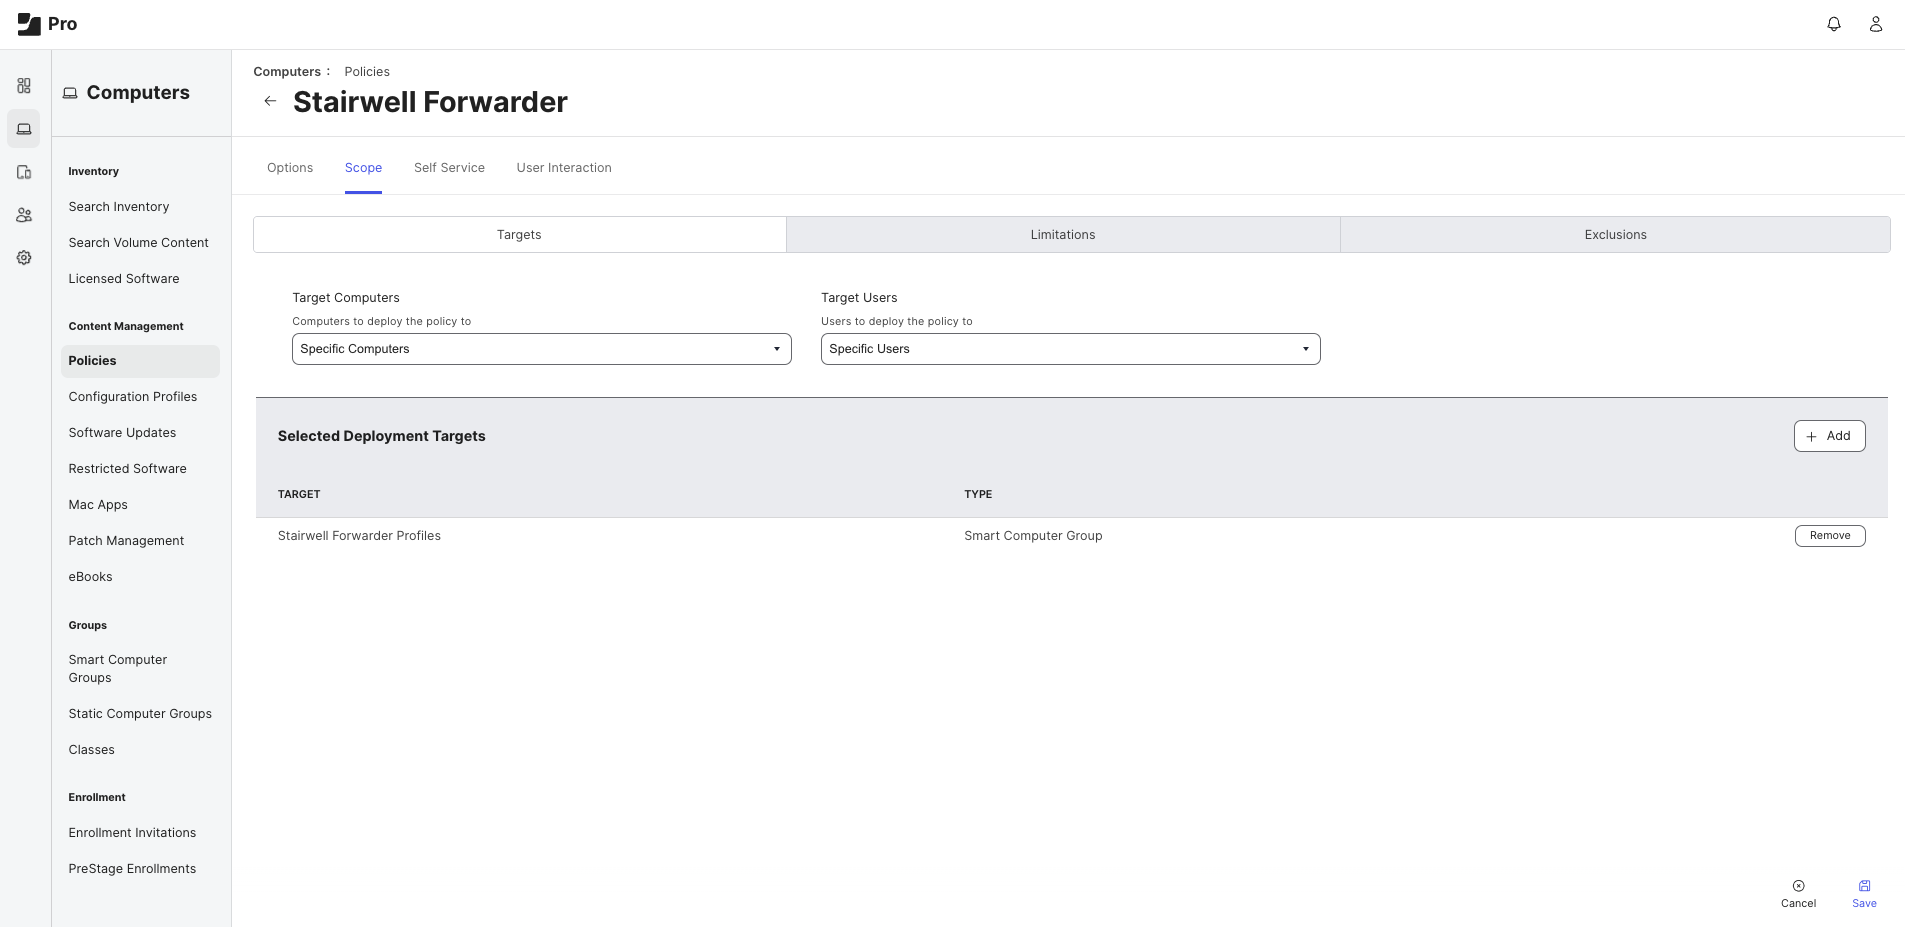
- Under Scope ➡️ Targets ➡️ Selected Deployment Targets
- Select
+ Add - Select
Computer Groups - Find the group created in Step 2, Select
Add
- Select
- Select 💾
Save
Additional Notes
- If the profile payloads from the steps above are incorrect or not present before the installer runs, the installation will fail and require remediation.
- Once the above configuration profiles, smart groups, packages, and policies are created, Jamf Pro will automatically install the package on the machines which have the required profiles.
5. Confirm Installation
- Navigate to https://app.stairwell.com and log in
- Select
Assets - Select the newly created asset name(s) to confirm the retrieval of files
- Take note of the data under All Objects
Updated 8 months ago